


Configure TLS
This guide explains how to use the TLS Configure interface to manage TLS settings for your database. You can update TLS certificates, rotate existing ones, or remove TLS entirely — all managed through a OpsRequest that is applied safely to your cluster.
1. Getting Started
To begin, select TLS Configure from the Operations section in the left sidebar.
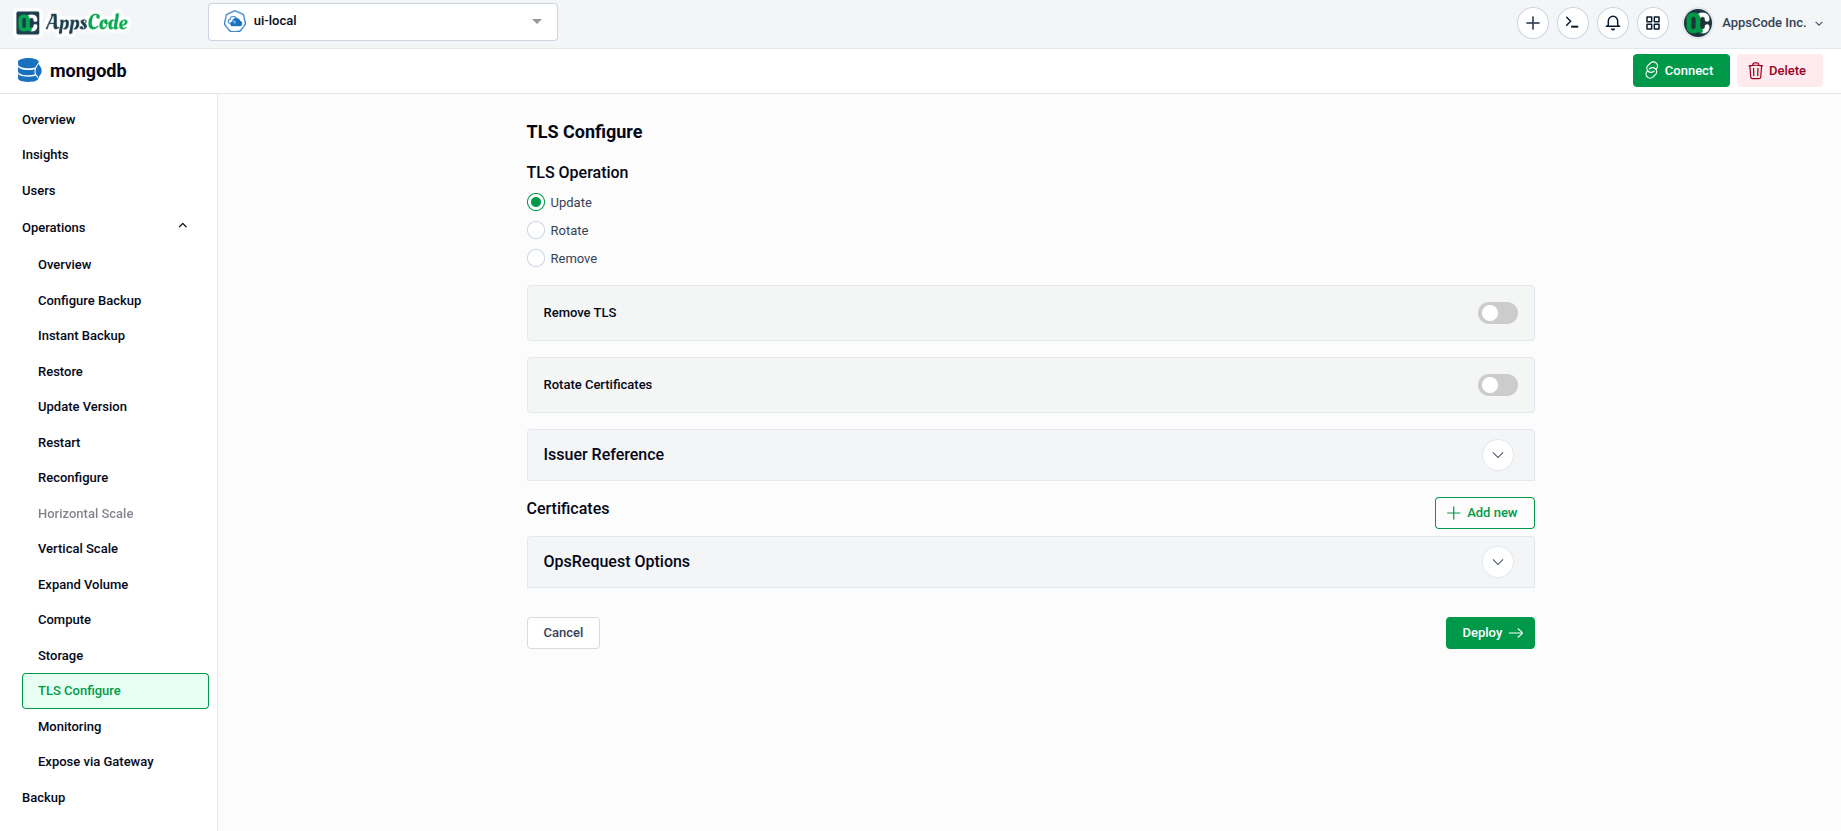
You will land on the TLS Configure form, which is divided into the following sections:
- TLS Operation — Choose the type of TLS action to perform.
- Remove TLS — Toggle to strip TLS from the database entirely.
- Rotate Certificates — Toggle to force certificate rotation.
- Issuer Reference — Specify the cert-manager issuer to use.
- Certificates — Define one or more certificates with custom subject and SAN details.
- OpsRequest Options — Configure timeout and apply policy for the operation.
2. Configuring the TLS Operation
2.1 - Select a TLS Operation
Under TLS Operation, choose the action you want to perform:
- Update — Add or update TLS configuration on the database. Use this to enable TLS for the first time or to change existing certificate settings.
- Rotate — Force a rotation of the current TLS certificates without changing the configuration.
- Remove — Strip TLS from the database entirely.
The Remove TLS and Rotate Certificates toggles act as quick shortcuts for those specific operations without changing any other settings.
2.2 - Configure the Issuer Reference
Expand the Issuer Reference panel to specify which cert-manager issuer should sign the certificates.
- API Group: The cert-manager API group (e.g., Defaults to
cert-manager.io). - Kind: Select the type of issuer — typically
ClusterIssuerfor cluster-wide issuers orIssuerfor namespace-scoped ones. - Name: Enter the name of the issuer (e.g.,
ace-incluster).
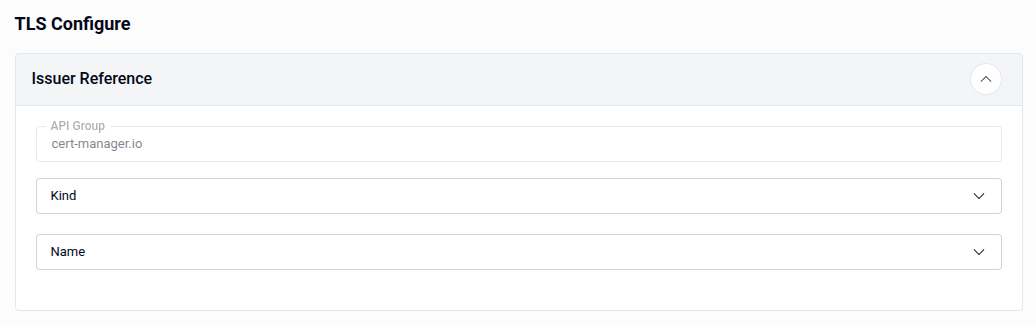
Note: The Issuer Reference is required when the Update operation is selected. Ensure the issuer exists in your cluster before proceeding.
3. Adding Certificates
The Certificates section allows you to define one or more certificates that will be managed by the TLS configuration. Click + Add new to add a certificate entry.
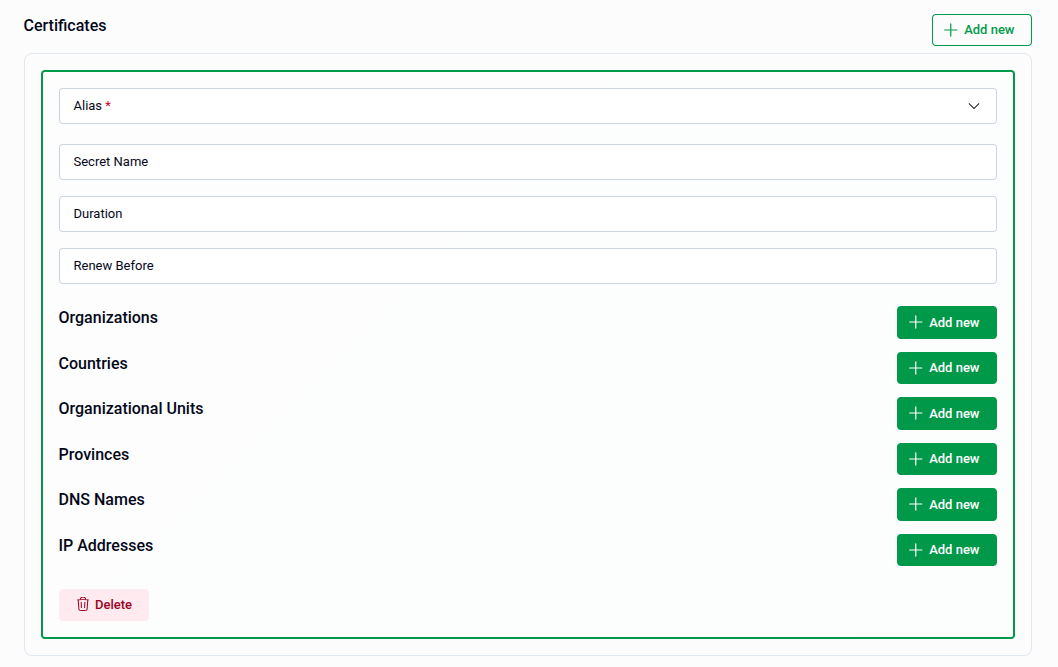
Each certificate entry contains the following fields:
| Field | Description |
|---|---|
| Alias | The role of the certificate. Required — select from the dropdown. |
| Secret Name | The Kubernetes secret where the certificate will be stored. |
| Duration | The validity period of the certificate (e.g., 8760h for one year). |
| Renew Before | How long before expiry the certificate should be renewed (e.g., 360h). |
| Organizations | One or more organization names for the certificate subject. |
| Countries | One or more country codes for the certificate subject. |
| Organizational Units | Organizational unit names for the certificate subject. |
| Provinces | Province or state names for the certificate subject. |
| DNS Names | Subject Alternative Names (SANs) as DNS hostnames. |
| IP Addresses | Subject Alternative Names (SANs) as IP addresses. |
Use the + Add new button next to each subject field to add multiple values. Use the Delete button at the bottom of an entry to remove a certificate.
3.1 - Selecting the Certificate Alias
The Alias dropdown identifies the role of the certificate within the database. The available options are:
- server — The certificate used by the database server for incoming TLS connections.
- client — The certificate used by clients connecting to the database.
- metrics-exporter — The certificate used by the metrics exporter for secure scraping.
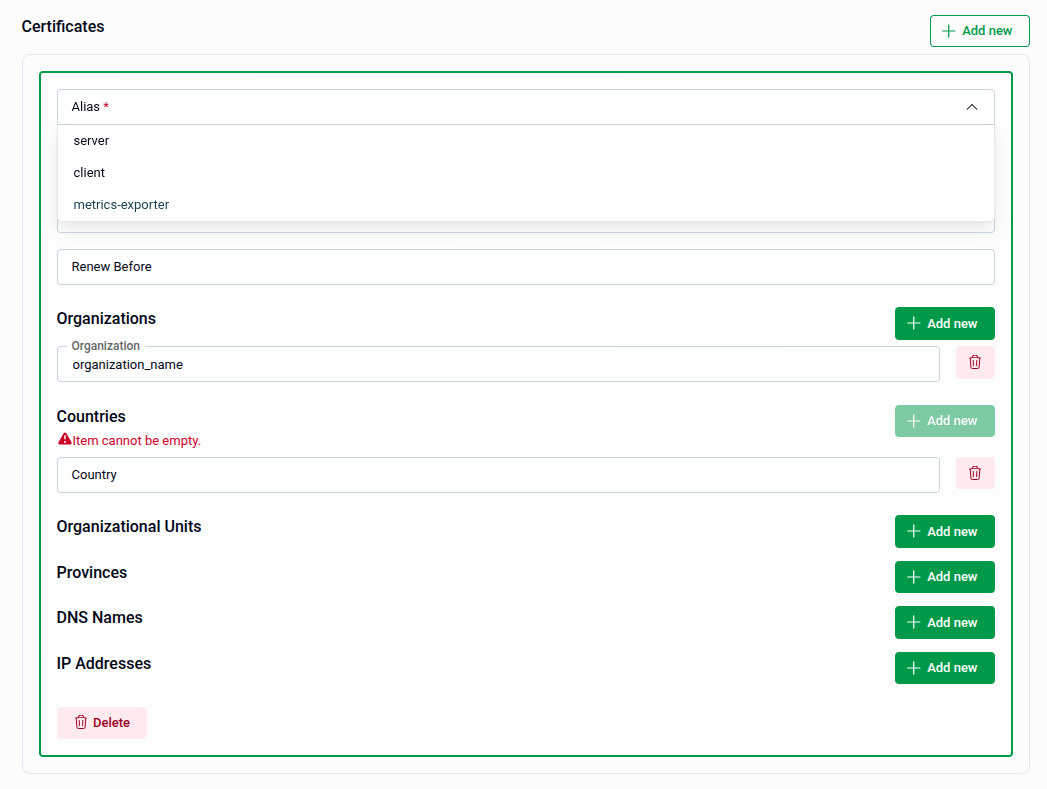
Note: Fields marked with a red asterisk are required. The filed with
+ Add newbutton validates entries on input — leaving an added row empty will show an "Item cannot be empty" warning. Also You can add multiple instance of them.
4. Review and Submit
Once all sections are configured, click Preview to review the generated OpsRequest manifest before applying it if preview is enabled. Then:
- The manifest is shown in YAML view by default. Use the JSON button to switch to JSON format if preferred.
- Use the Copy button to copy the manifest to your clipboard.
- Click Previous to go back and adjust your settings if needed.
Tip: You can directly edit the YAML or JSON on the Preview page before submitting. This is useful for making precise adjustments beyond what the form fields expose.
- Submit: Once satisfied, click Submit to apply the TLS configuration to your database.
Note: After submitting, a
OpsRequestof typeReconfigureTLSwill be created in your cluster.
Quick Reference
| Action | How to do it |
|---|---|
| Enable or update TLS | Select Update under TLS Operation → configure Issuer Reference → add Certificates → Preview → Submit |
| Rotate existing certificates | Select Rotate under TLS Operation (or toggle Rotate Certificates) → Preview → Submit |
| Remove TLS from the database | Select Remove under TLS Operation (or toggle Remove TLS) → Preview → Submit |
| Add a certificate | Certificates → + Add new → fill in Alias, fields, and SANs |
| Remove a certificate entry | Click Delete at the bottom of the certificate entry |
| Edit manifest before applying | Use the YAML / JSON toggle on the Preview page |
| Apply the TLS change | Click Submit on the Preview page |