


Backup Storage
This guide explains how to view and create BackupStorage resources using the AppsCode console. A BackupStorage defines the storage backend (cloud provider, credentials, bucket, and connection settings) where database backups are stored and can be retrieved for restoration.
1. Getting Started
Navigate to Backups in the left sidebar and select BackupStorage. This opens the BackupStorage list page showing all configured storage backends in your cluster.
2. BackupStorage List
The list page displays all BackupStorage resources configured in your cluster. Use the Select Namespace dropdown to filter by namespace, or click Create New Instance to add a new storage backend.
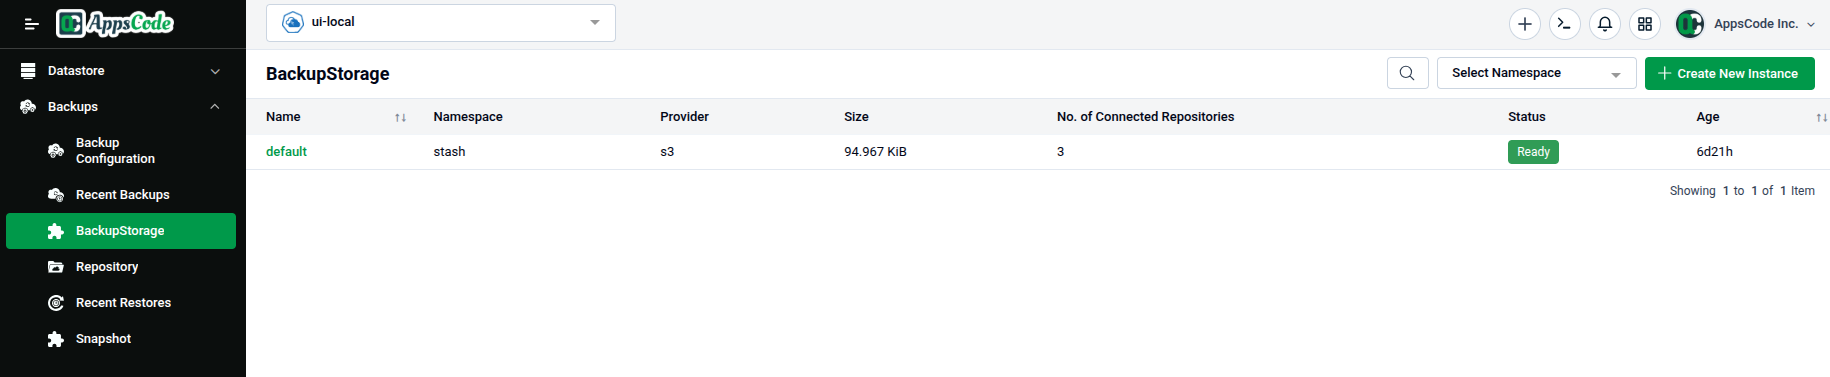
| Column | Description |
|---|---|
| Name | The BackupStorage resource name. |
| Namespace | The namespace where it is deployed. |
| Provider | The cloud storage provider (e.g., s3, azure, gcs). |
| Size | Total data stored across all connected repositories. |
| No. of Connected Repositories | Number of Repository resources using this storage backend. |
| Status | Current state of the storage connection (e.g., Ready, Failed). |
| Age | How long ago the BackupStorage was created. |
3. Viewing a BackupStorage
Click on any BackupStorage name in the list to open its detail page. The detail page shows storage connection details and linked repositories.
3.1 - Overview
The detail page shows all relevant information about the storage backend:
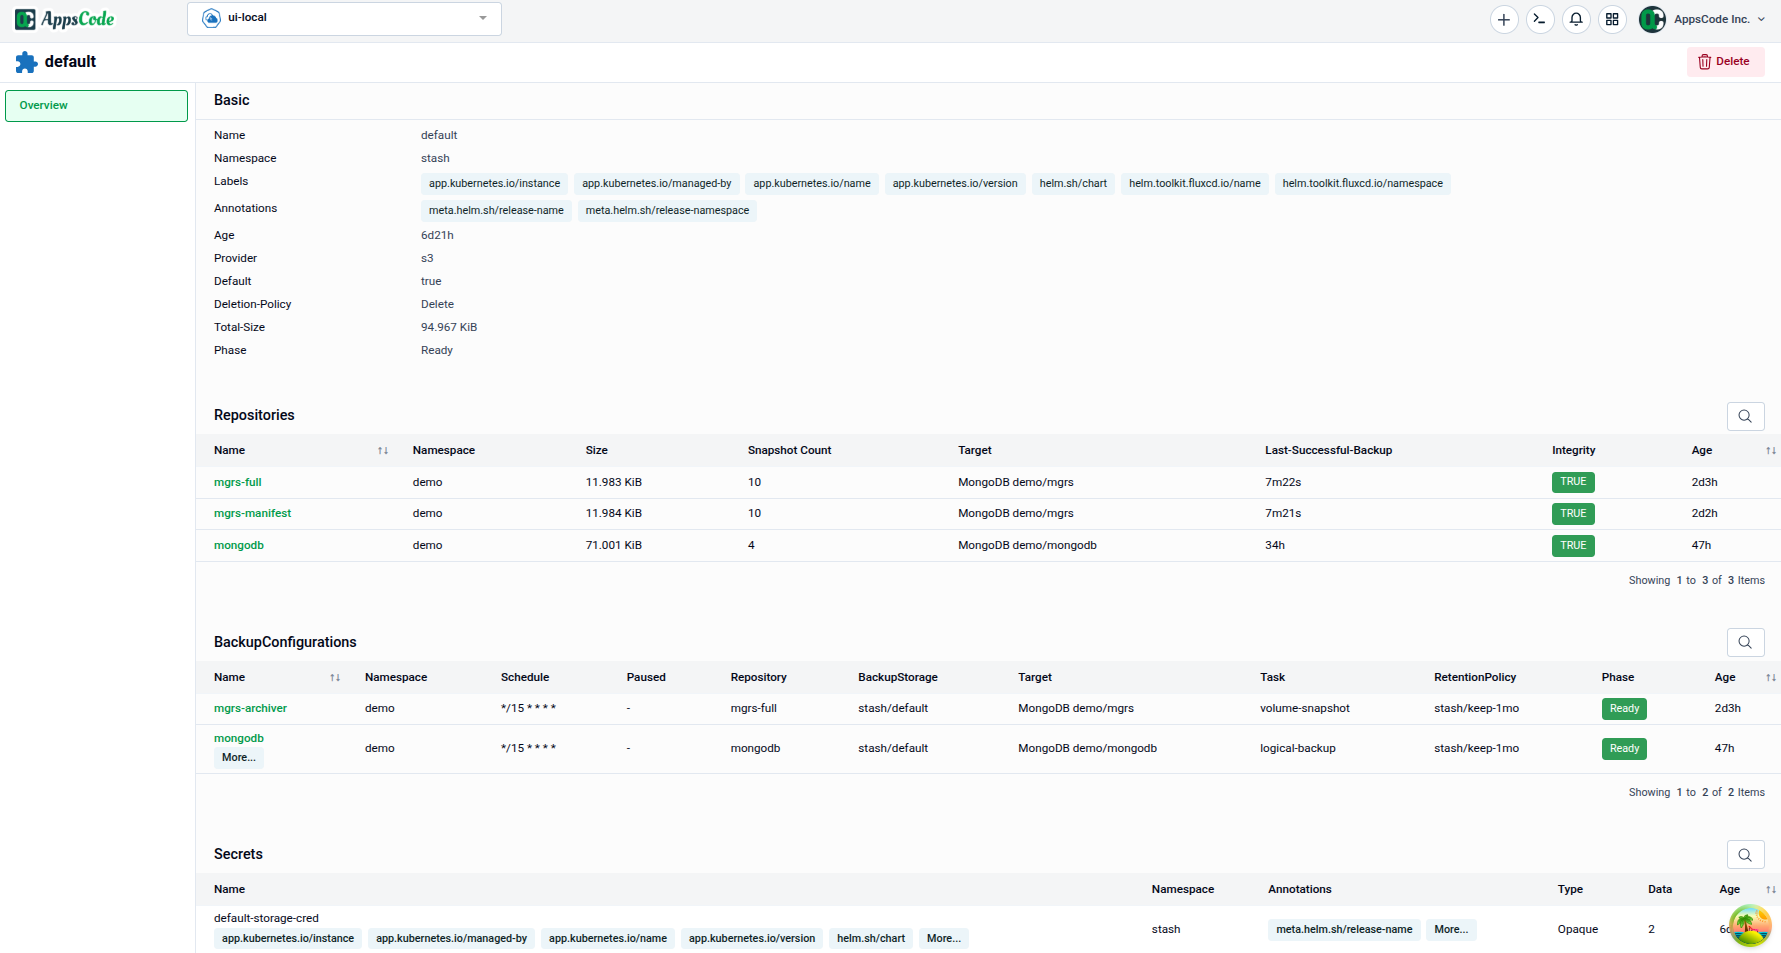
Basic — Core metadata for the storage:
| Field | Description |
|---|---|
| Name | The BackupStorage resource name. |
| Namespace | The namespace it belongs to. |
| Labels | Key-value labels for organization and filtering. |
| Annotations | Key-value annotations including provider and secret references. |
| UID | The unique Kubernetes identifier. |
| Provider | The cloud storage provider (e.g., azure, s3, gcs). |
| Status | Current connection status. |
Repositories — All Repository resources using this storage backend:
| Column | Description |
|---|---|
| Name | The Repository resource name. |
| Namespace | Namespace of the repository. |
| Size | Total size of snapshots stored in this repository. |
| Snapshots | Number of snapshots contained. |
| Target | The database being backed up. |
| Retention Policy | The RetentionPolicy controlling snapshot cleanup. |
| Status | Repository status (e.g., Ready). |
| Age | Age of the Repository resource. |
BackupConfigurations — All BackupConfigurations using this storage:
| Column | Description |
|---|---|
| Name | The BackupConfiguration resource name. |
| Namespace | Namespace of the configuration. |
| Schedule | The cron expression for scheduled backups. |
| Target | The database being backed up. |
| Session | The session name within the configuration. |
| Invoker Kind | Always BackupConfiguration. |
| Task | The backup task type (e.g., logical-backup). |
| Paused | Whether backups are paused. |
| Status | Configuration status. |
4. Creating a BackupStorage
To add a new storage backend, click Create New Instance from the BackupStorage list page. The Create BackupStorage form will open.
4.1 - Basic Information
The form starts with basic identity fields:
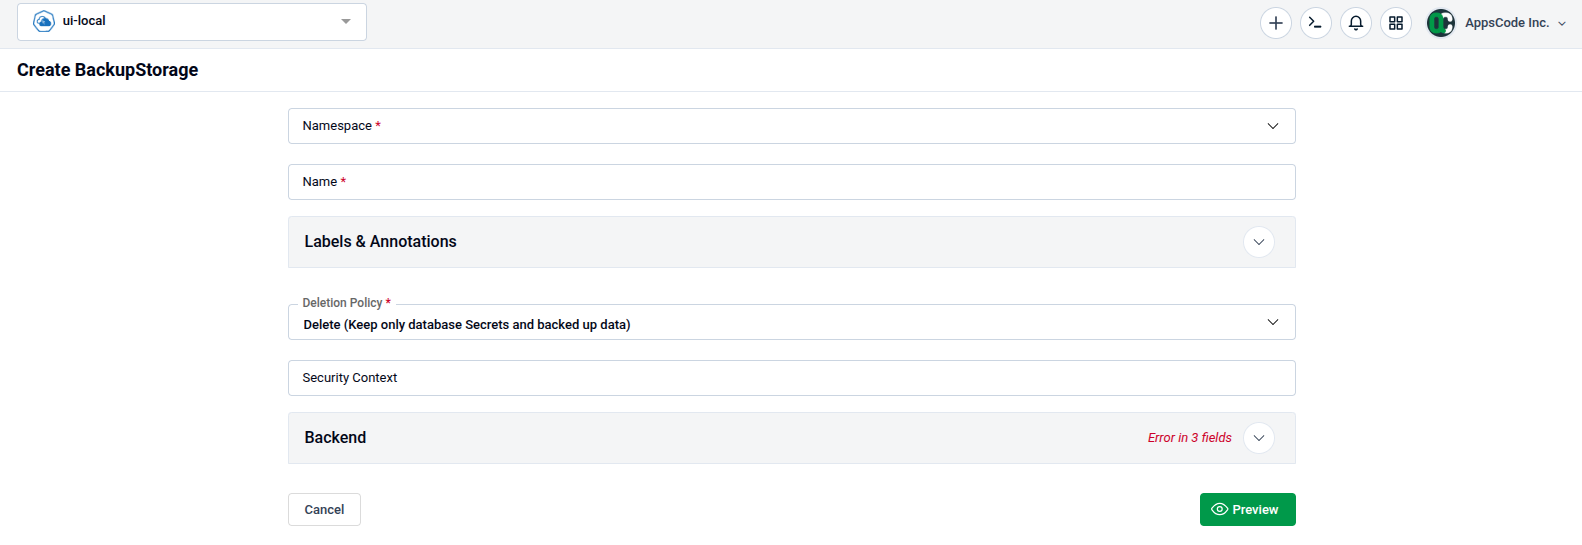
| Field | Description |
|---|---|
| Namespace | The Kubernetes namespace where the BackupStorage will be created. Required. |
| Name | A unique name for this BackupStorage (e.g., s3-backup). Required. |
| Deletion Policy | Controls what happens when the BackupStorage is deleted. Default: Delete (Keep only database Secrets and backed up data). Required. |
| Security Context | Optional pod security context for backup operations (e.g., run-as user). |
4.2 - Labels & Annotations
Expand the Labels & Annotations section to attach custom metadata for organization and integration:
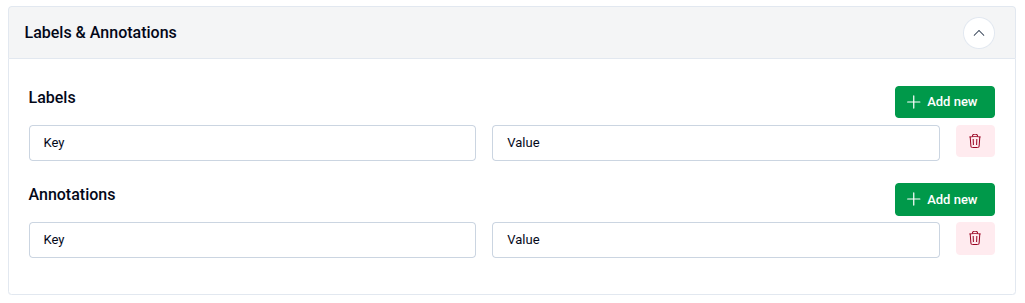
- Use + Add new under Labels to add key-value label pairs.
- Use + Add new under Annotations to add key-value annotation pairs.
- Use the delete icon on any row to remove an entry.
4.3 - Backend Configuration
The Backend section defines the storage provider and its credentials. This is where you configure the actual cloud storage connection.
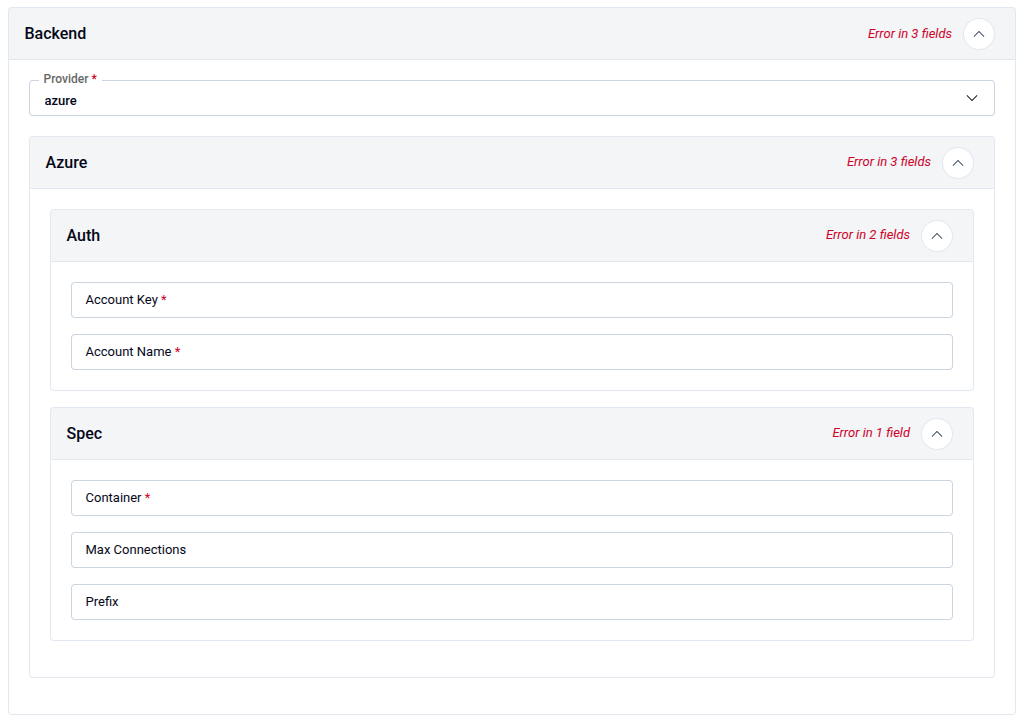
Backend Provider
- Provider — Select the cloud storage provider from the dropdown. Available options include:
s3— Amazon S3 or S3-compatible storageazure— Microsoft Azure Blob Storagegcs— Google Cloud Storage- Others depending on your cluster's backup addon
Provider-Specific Configuration
Once a provider is selected, provider-specific sub-panels appear for authentication and storage specification.
For Azure (example shown):
Auth — Authentication credentials:
| Field | Description |
|---|---|
| Account Key | Azure Storage Account access key. Required. |
| Account Name | Azure Storage Account name. Required. |
Spec — Storage specifications:
| Field | Description |
|---|---|
| Container | Azure Blob Storage container name where backups are stored. Required. |
| Max Connections | Maximum concurrent connections to the storage backend. Optional. |
| Prefix | Prefix for all backup objects (e.g., db-backups/). Optional. |
Note: Provider-specific fields vary. Refer to your backup addon documentation for S3, GCS, or other providers.
5. Preview and Submit
Once all required fields are filled, click Preview to review the generated BackupStorage manifest before applying it.
- The manifest is shown in YAML view by default. Use the JSON button to switch to JSON format if preferred.
- Use the Copy button to copy the manifest to your clipboard.
- Click Previous to go back and adjust your settings if needed.
Tip: You can directly edit the YAML or JSON on the Preview page before submitting. This is useful for making precise adjustments beyond what the form fields expose.
- Submit: Once satisfied, click Submit to create the BackupStorage in your cluster.
Note: After submitting, the BackupStorage resource will be created and validated. Once
StatusshowsReady, it can be referenced by BackupConfigurations and RetentionPolicies.
Quick Reference
| Action | How to do it |
|---|---|
| View all BackupStorages | Backups → BackupStorage |
| Filter by namespace | Use the Select Namespace dropdown on the list page |
| View storage detail | Click on the BackupStorage name in the list |
| Check repository count | Detail page → Repositories table |
| Check linked configurations | Detail page → BackupConfigurations table |
| Check storage status | Detail page → Basic section → Status field |
| Open the create form | List page → Create New Instance |
| Add labels or annotations | Labels & Annotations → + Add new → enter Key and Value |
| Set deletion policy | Deletion Policy dropdown → select policy |
| Configure storage provider | Backend → Provider dropdown → select cloud provider |
| Set Azure storage account | Backend → Auth → enter Account Key and Account Name |
| Set Azure container | Backend → Spec → enter Container name |
| Set storage prefix | Backend → Spec → Prefix → optional path prefix |
| Review before creating | Click Preview |
| Edit manifest directly | Use the YAML / JSON toggle on the Preview page |
| Create the storage backend | Click Submit on the Preview page |