


Restore
This guide explains how to view and create Restore resources using the AppsCode console. A Restore represents a database recovery operation that restores data from a previously captured snapshot or backup to a target database instance.
1. Getting Started
Navigate to Backups in the left sidebar and select Restore. This opens the Restore list page showing all restore operations across your cluster.
2. Restore List
The list page displays all Restore resources in your cluster, including both scheduled and manually triggered restores. Use the Select Namespace dropdown to filter by namespace.
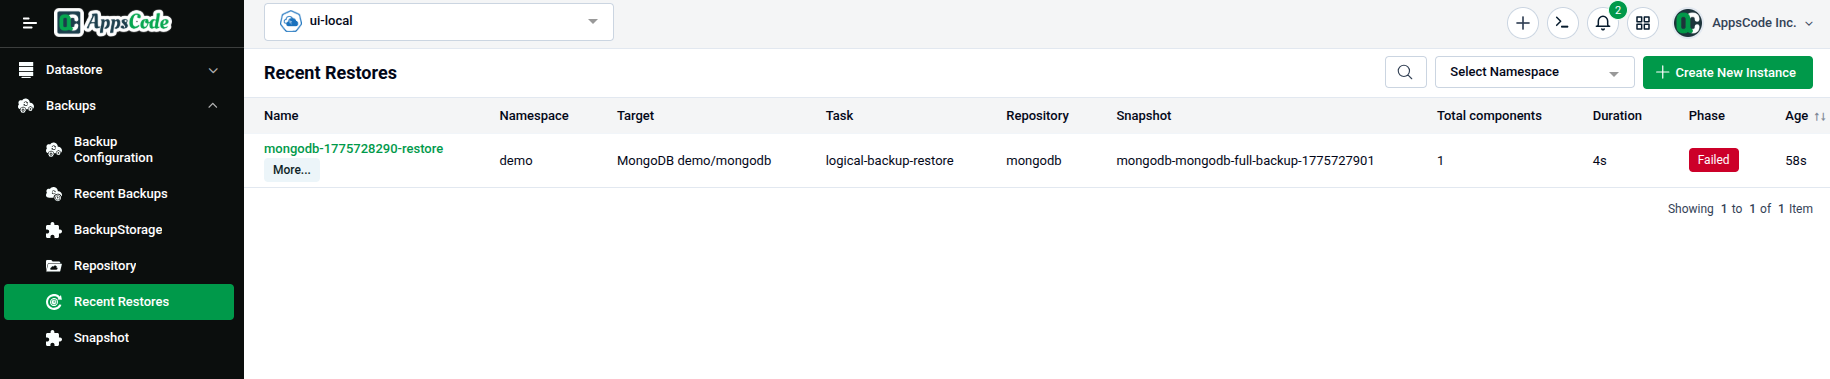
| Column | Description |
|---|---|
| Name | The Restore resource name. |
| Namespace | The namespace where it is deployed. |
| Target | The target database instance being restored to. |
| Task | The restore task type executed (e.g., logical-restore). |
| Repository | The repository containing the source snapshot. |
| Snapshot | The snapshot being restored from. |
| Total components | Number of database components being restored. |
| Duration | Elapsed time for the restore operation. |
| Phase | Current status (e.g., Succeeded, Running, Failed). |
| Age | How long ago the Restore was created. |
3. Creating a Restore
To manually trigger a restore operation, click Create New Instance from the Restore list page.
The Create Restore form will open with the following fields:
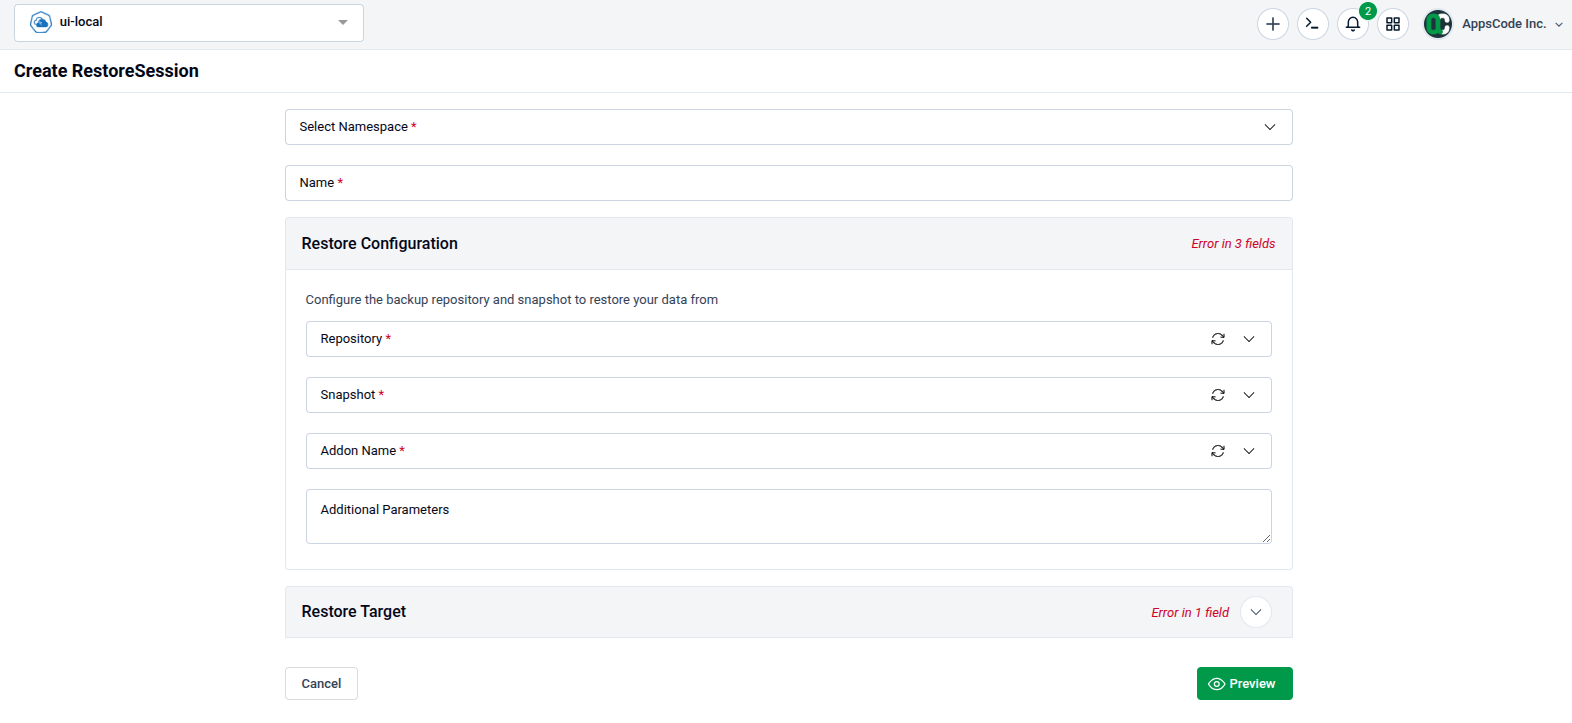
3.1 - Basic Fields
| Field | Description |
|---|---|
| Namespace | The Kubernetes namespace where the Restore resource will be created. Required. |
| Labels & Annotations | Optional metadata key-value pairs for organization and filtering. |
| Restore Name | A unique name for this Restore operation (e.g., mongodb-restore-001). Required. |
3.2 - Labels & Annotations
Use the Labels & Annotations section to attach custom metadata:
- Use + Add new under Labels to add key-value label pairs.
- Use + Add new under Annotations to add key-value annotation pairs.
- Use the delete icon on any row to remove an entry.
3.3 - Source Snapshot Configuration
The Source Snapshot section specifies which backup snapshot to restore from.
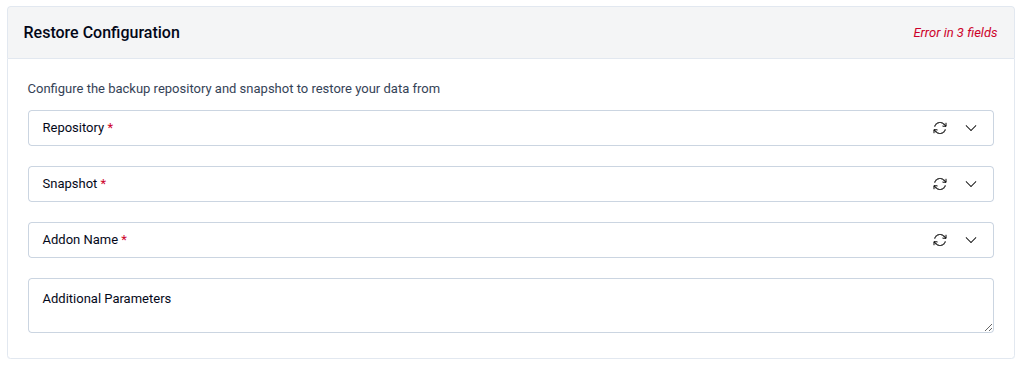
| Field | Description |
|---|---|
| Repository Namespace | The namespace of the Repository resource. Required. |
| Repository Name | The name of the Repository containing the snapshot. Required. |
| Snapshot Name | The name of the Snapshot to restore from. Required. |
3.4 - Target Database Configuration
The Target Database section identifies where the data will be restored.
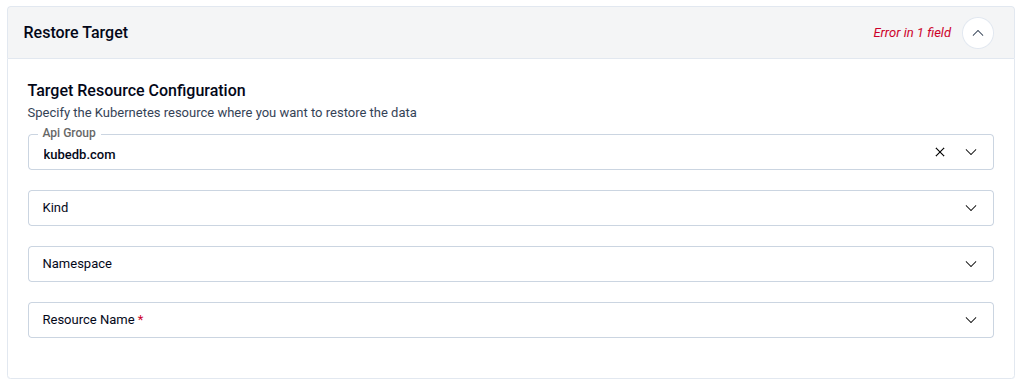
| Field | Description |
|---|---|
| Api Group | The API group of the target resource (e.g., kubedb.com). Required. |
| Kind | The resource kind of the target database (e.g., MongoDB). Required. |
| Namespace | The namespace where the target database resides. Required. |
| Name | The name of the target database instance. Required. |
Note: All four Target fields are required. The target database must exist and be in a ready state before the restore begins.
4. Preview and Submit
Once all required fields are filled, click Preview to review the generated Restore manifest before applying it.
- The manifest is shown in YAML view by default. Use the JSON button to switch to JSON format if preferred.
- Use the Copy button to copy the manifest to your clipboard.
- Click Previous to go back and adjust your settings if needed.
Tip: You can directly edit the YAML or JSON on the Preview page before submitting. This is useful for making precise adjustments beyond what the form fields expose.
- Submit: Once satisfied, click Submit to create the Restore and begin the restoration process.
Note: After submitting, the restore operation will begin immediately. Monitor the restore status on the detail page. The target database will be updated with the restored data once the operation completes successfully.
5. Quick Reference
| Action | How to do it |
|---|---|
| View all Restores | Backups → Restore |
| Filter by namespace | Use the Select Namespace dropdown on the list page |
| View restore detail | Click on the Restore name in the list |
| Check restore phase | Detail page → Basic section → Phase field |
| Check restore duration | Detail page → Basic section → Duration field |
| View source snapshot | Detail page → Source Snapshot table |
| View target database | Detail page → Target Database table |
| Open the create form | List page → Create New Instance |
| Add labels or annotations | Labels & Annotations → + Add new → enter Key and Value |
| Select source snapshot | Source Snapshot → set Repository Namespace, Name, and Snapshot Name |
| Set restore target | Target Database → fill Api Group, Kind, Namespace, and Name |
| Review before creating | Click Preview |
| Edit manifest directly | Use the YAML / JSON toggle on the Preview page |
| Start a restore operation | Click Submit on the Preview page |