


Manage Cluster Presets
Cluster Presets are reusable configuration templates that are automatically created when you enable certain Feature Sets (for example, Backup & Recovery creates a stash-presets preset). They define default values — such as backup schedule, storage references, and retention policies — that can be applied uniformly across multiple namespaces.
Step 1 — Open the Preset List
In the left sidebar, navigate to Preset (under Cluster Settings). The Cluster Presets page lists all presets available in your cluster.
Each row shows:
- Name — The preset's name (clickable to open its detail page)
- Namespace — The namespace the preset belongs to (or
-for cluster-scoped) - Annotations — Key labels attached to the preset (e.g.,
ace.appscode.com/managed: true,app.kubernetes.io/managed-by) - Age — How long ago the preset was created
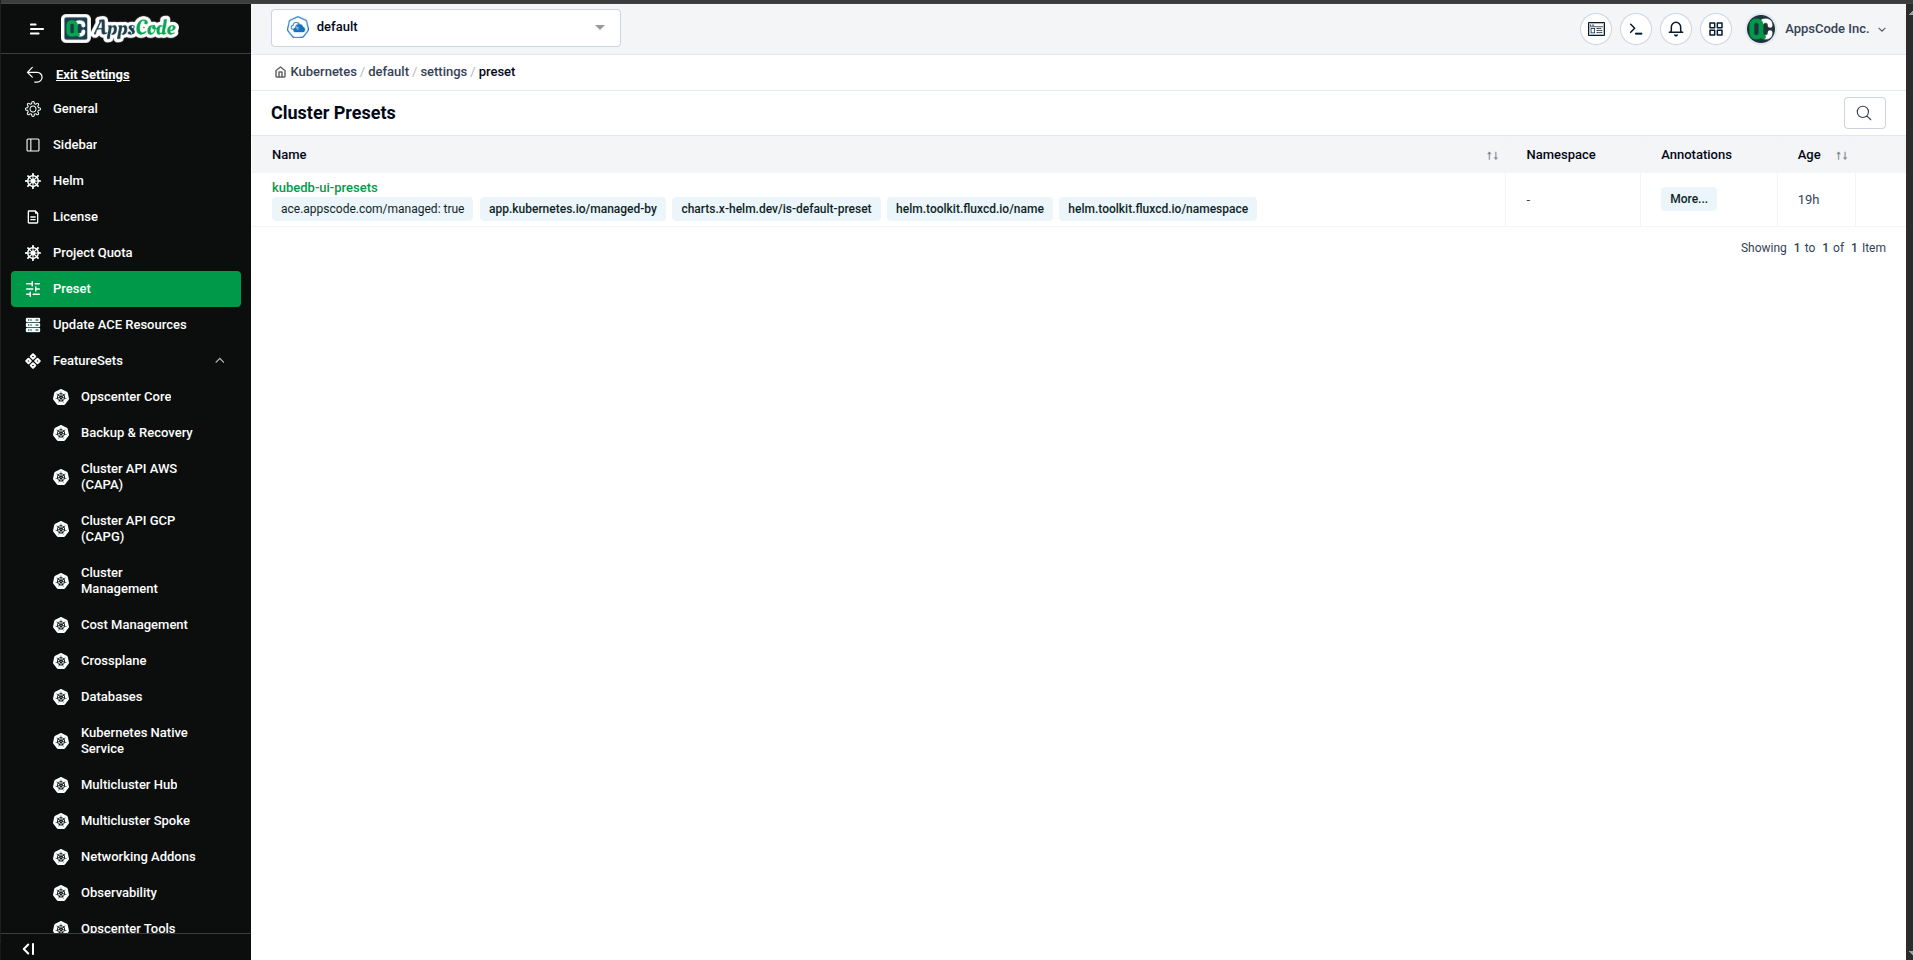
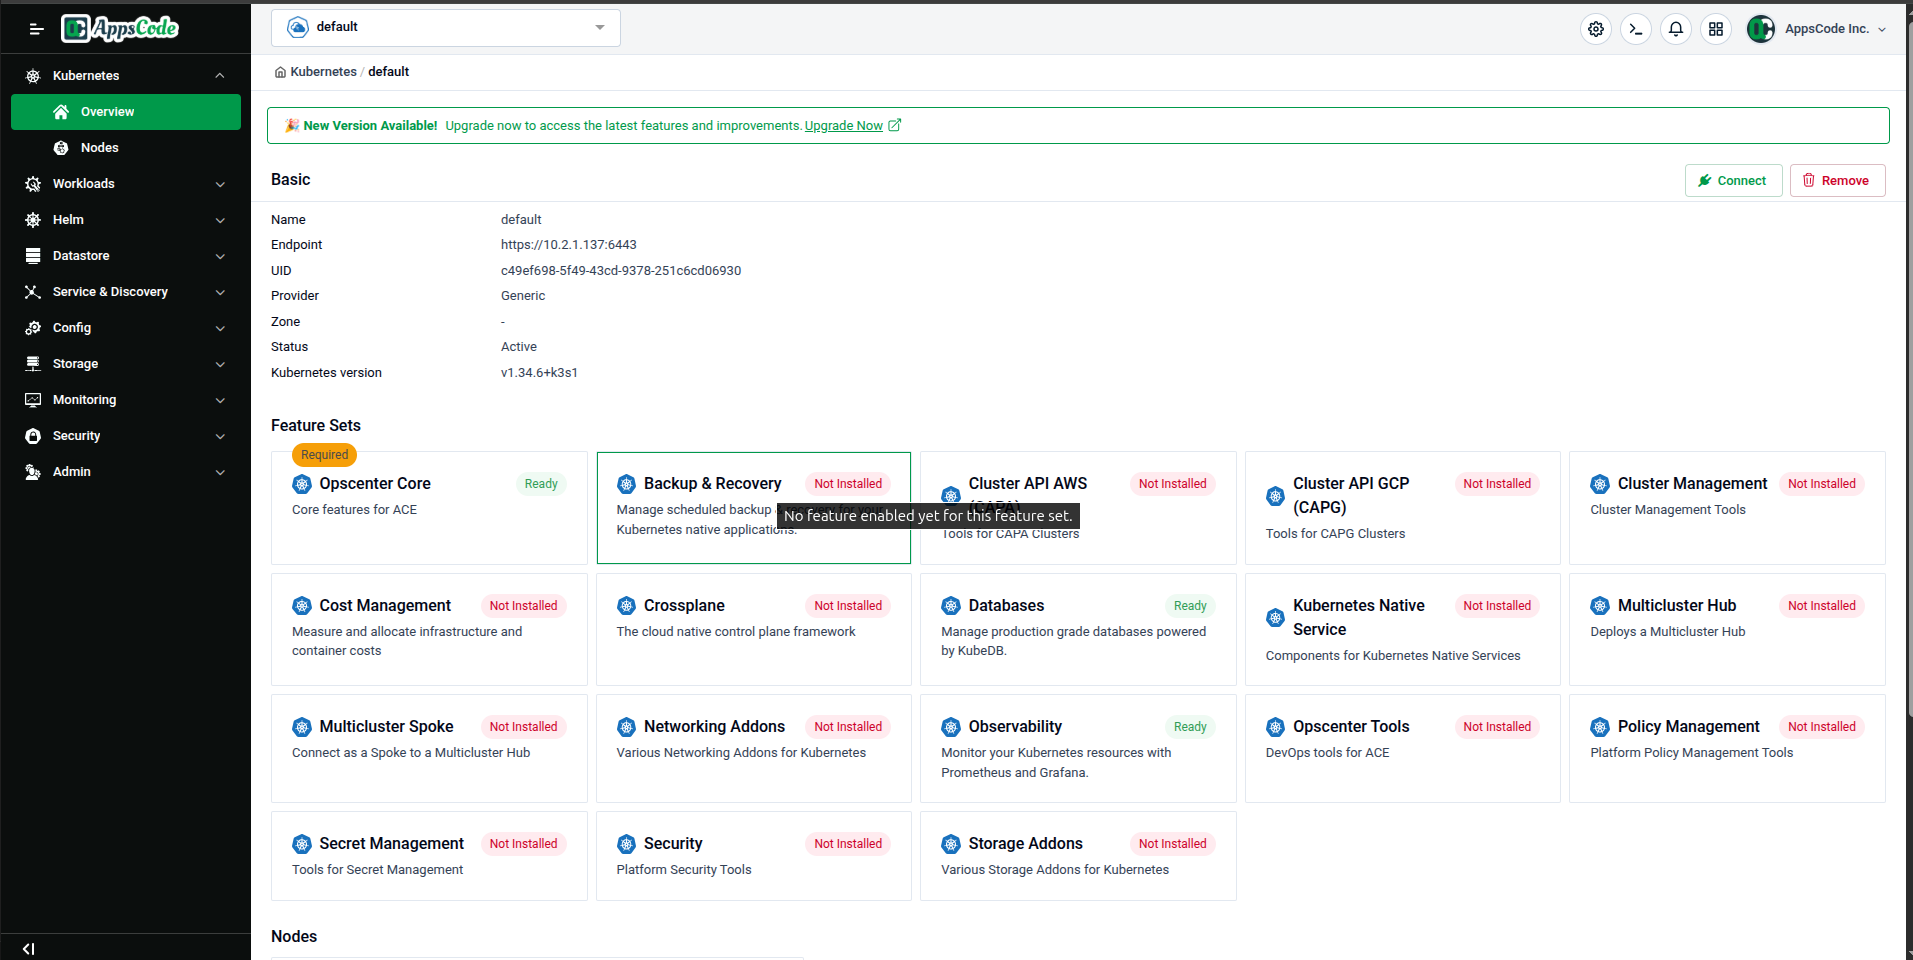
Presets are automatically created when you enable a Feature Set that requires preset configuration (such as Backup & Recovery). After enabling a Feature Set, you may see a new preset appear in this list.
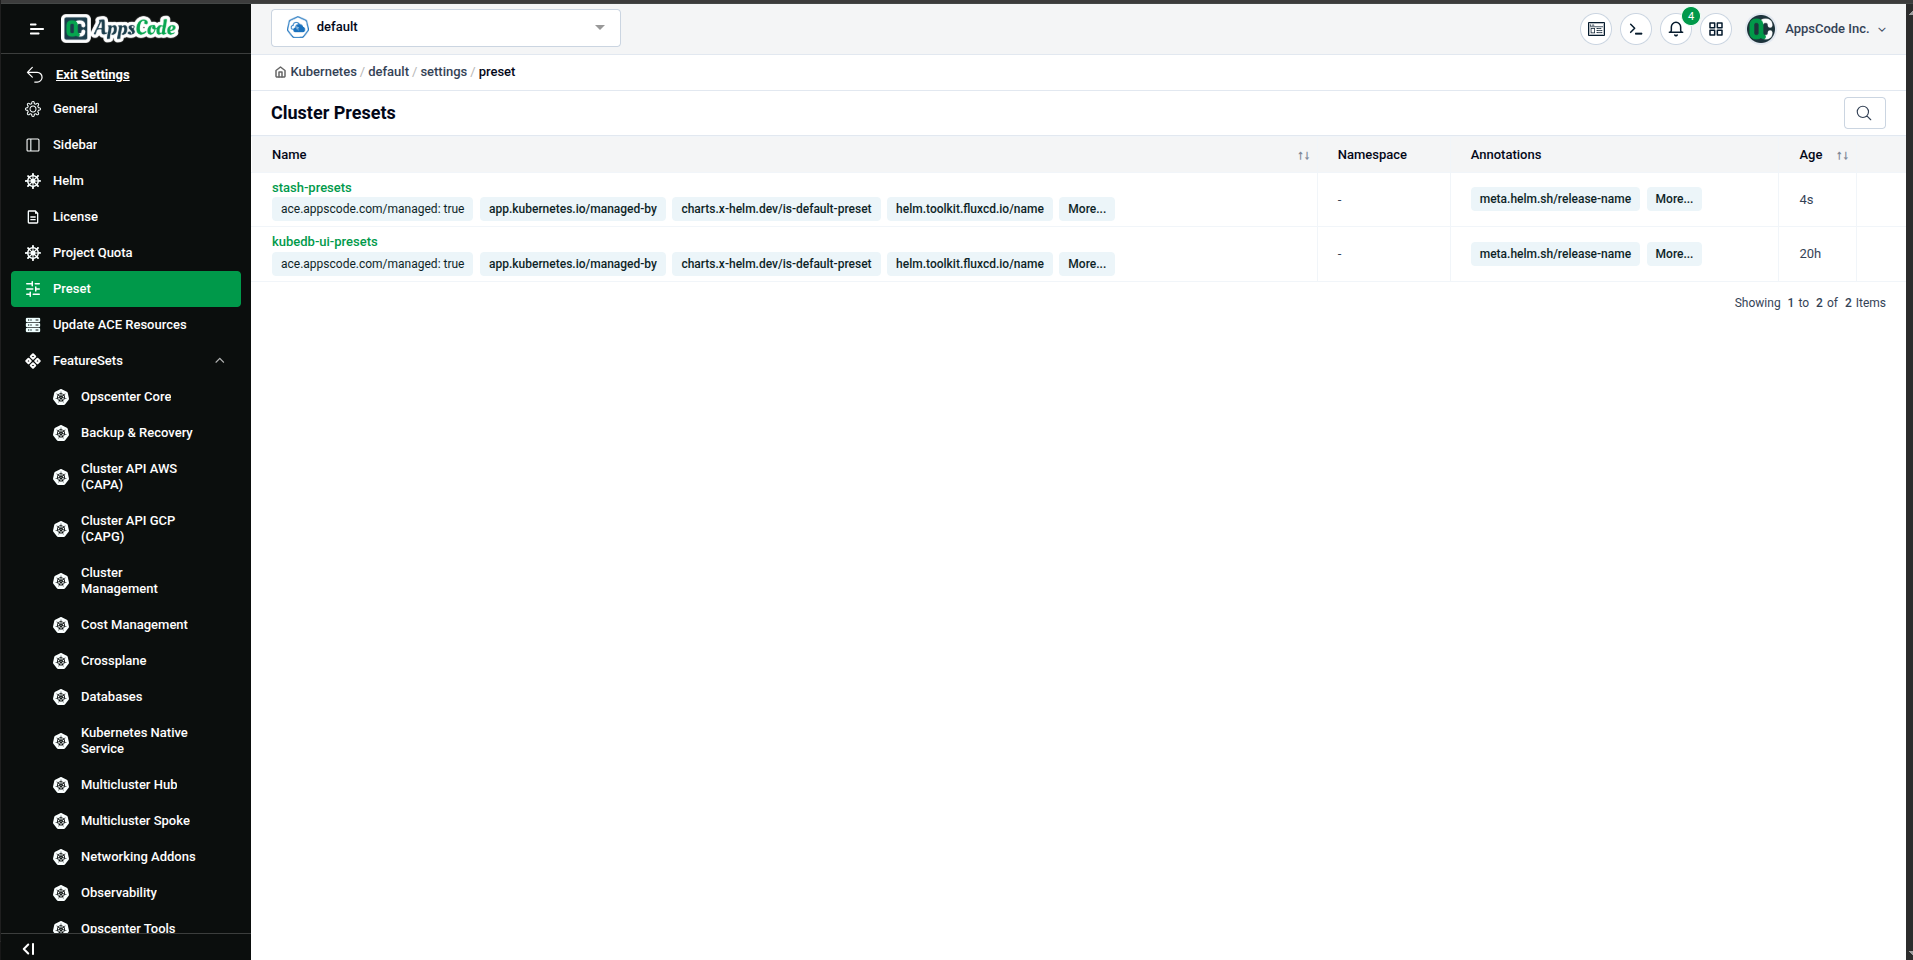
Step 2 — Open a Preset's Detail Page
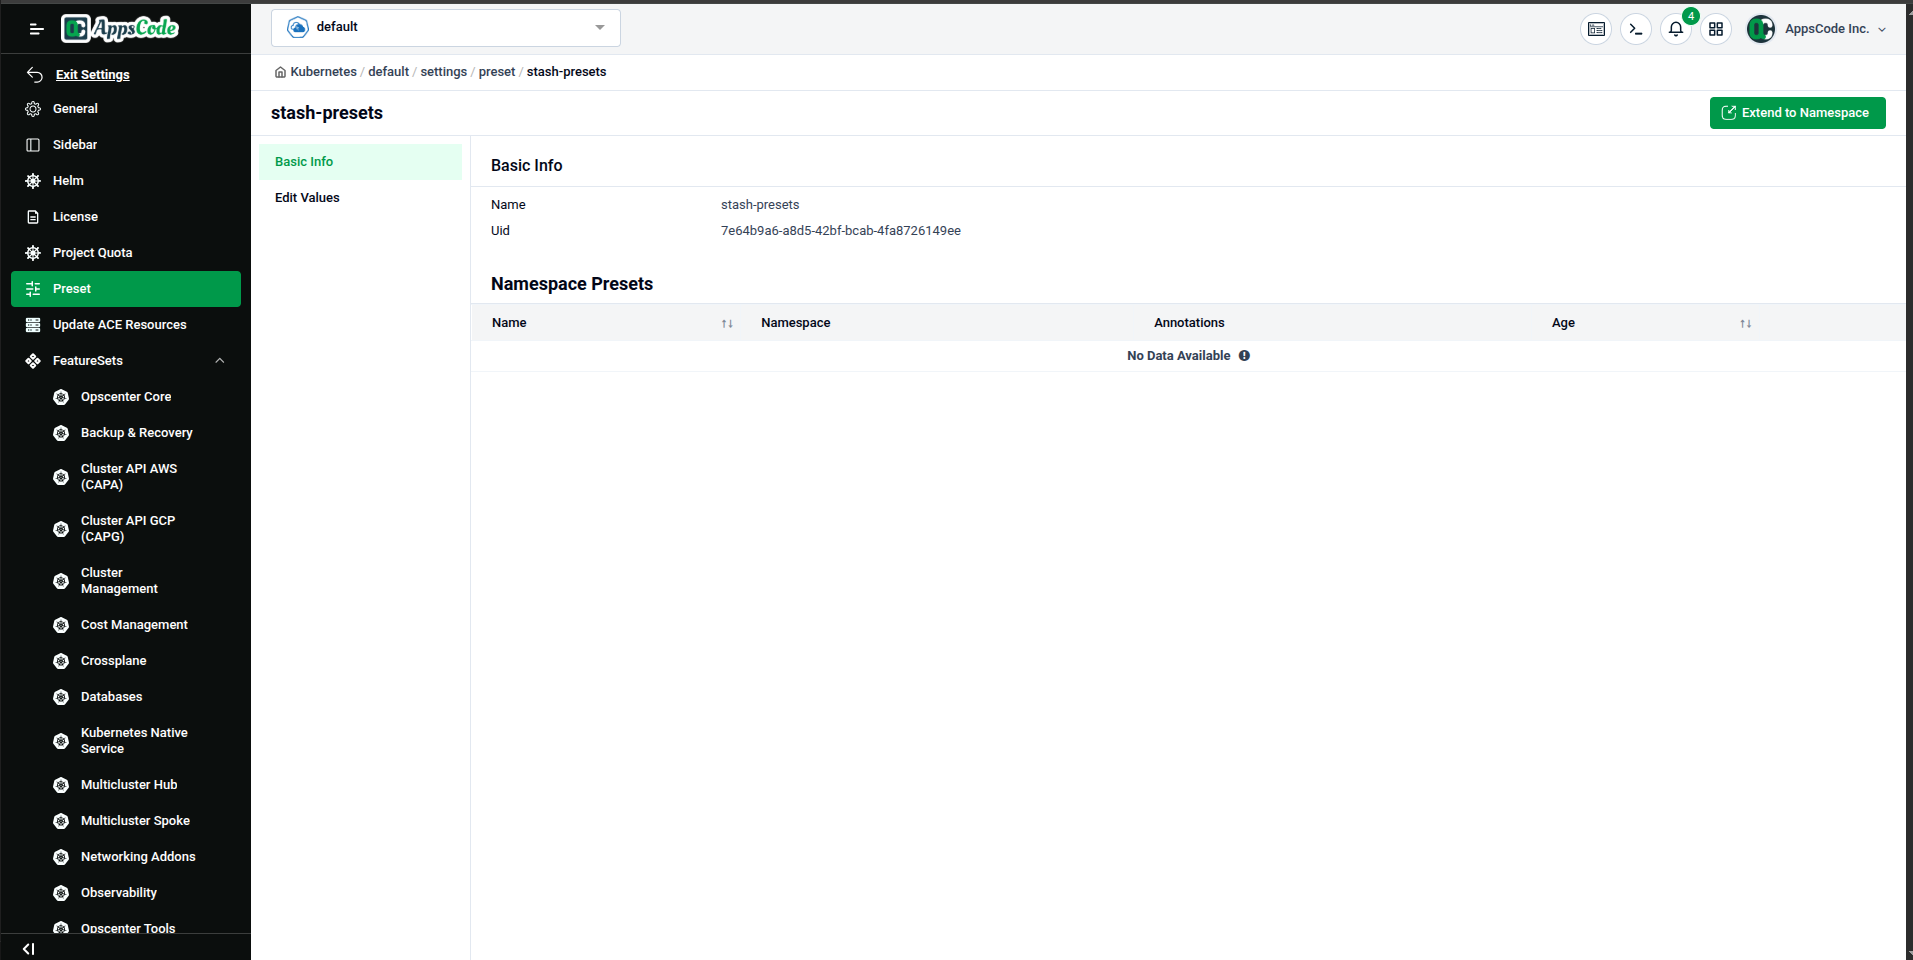
Click on a preset name (e.g., stash-presets) to open the Preset Detail page. This page has two tabs in the left panel:
- Basic Info — Lists the preset's name, UID, and any namespace-scoped copies (Namespace Presets)
- Edit Values — Lets you modify the preset's configuration values
The Basic Info tab also shows a Namespace Presets table with all namespace-level copies of this preset. If no copies exist yet, it shows "No Data Available."
A green Extend to Namespace button (top-right) creates a namespace-scoped copy of this preset.
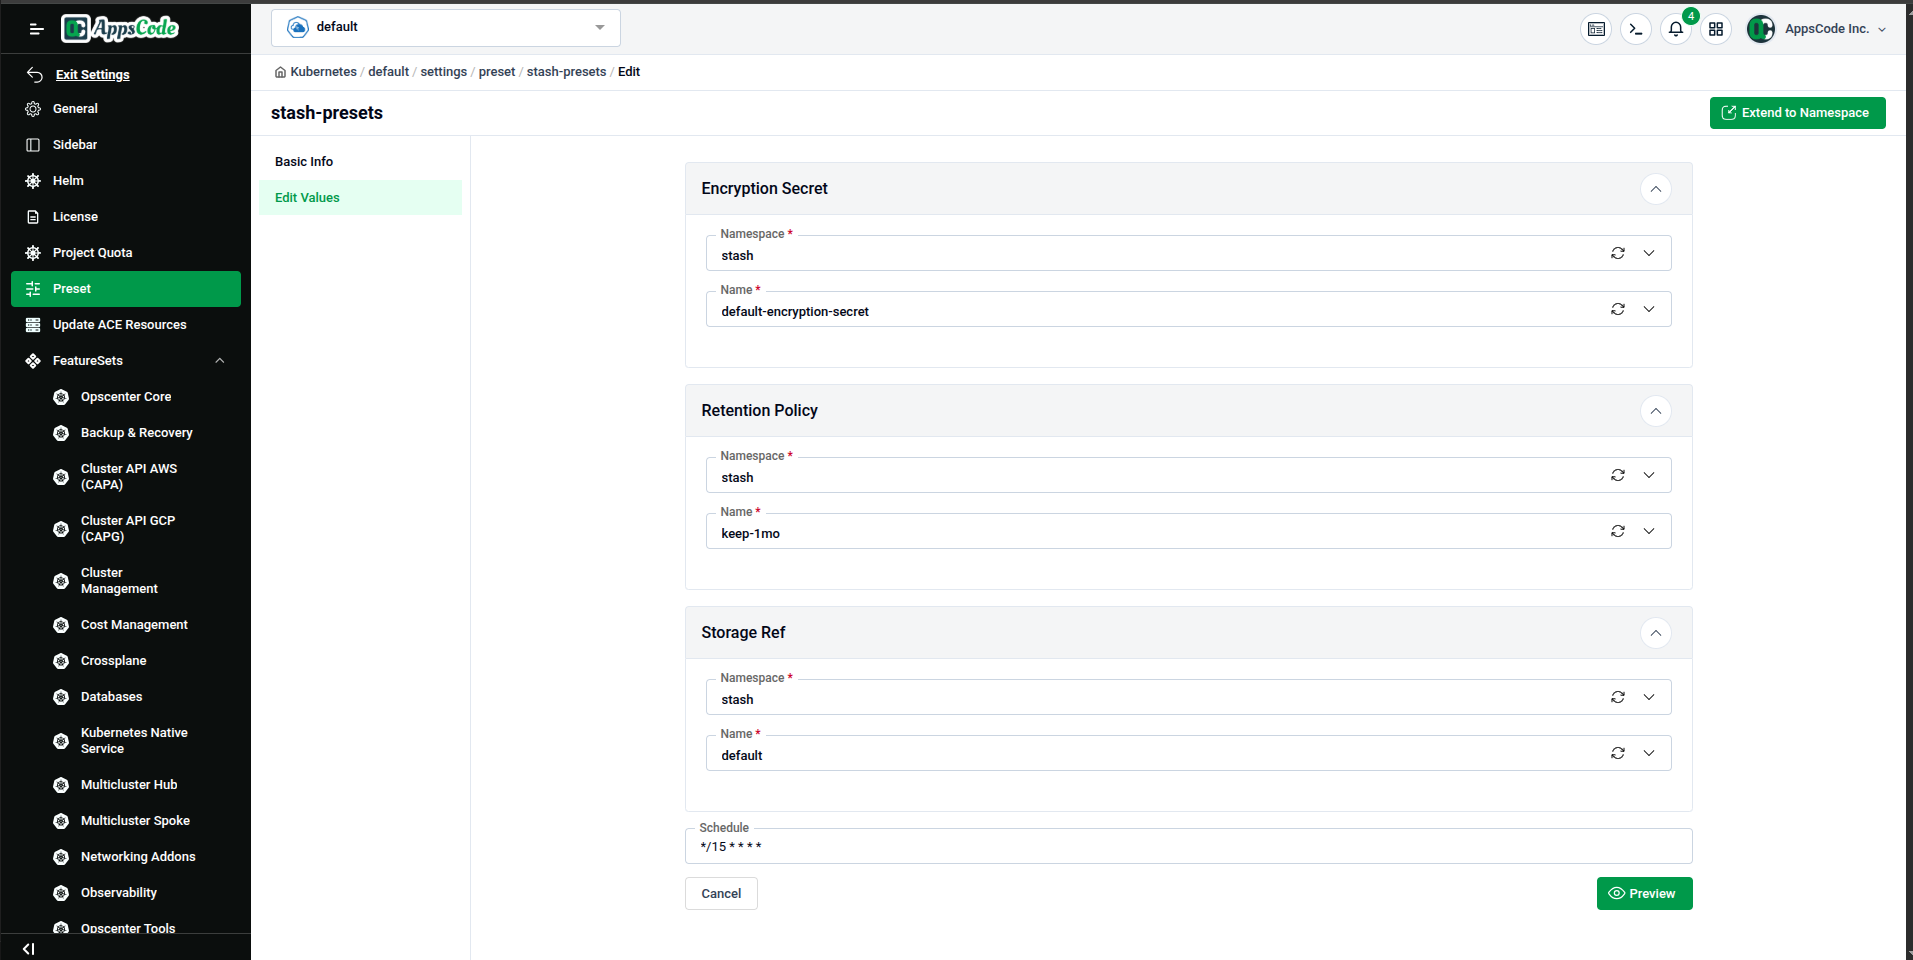
Step 3 — Edit Preset Values
Click the Edit Values tab in the left panel to modify the preset's default configuration.
The edit form presents each configurable section as a collapsible card. For example, the stash-presets preset exposes:
| Section | Fields |
|---|---|
| Encryption Secret | Namespace, Name |
| Retention Policy | Namespace, Name |
| Storage Ref | Namespace, Name |
| Schedule | A cron expression (e.g., */15 * * * *) |
Update the values as needed and click Preview to advance to the review step.
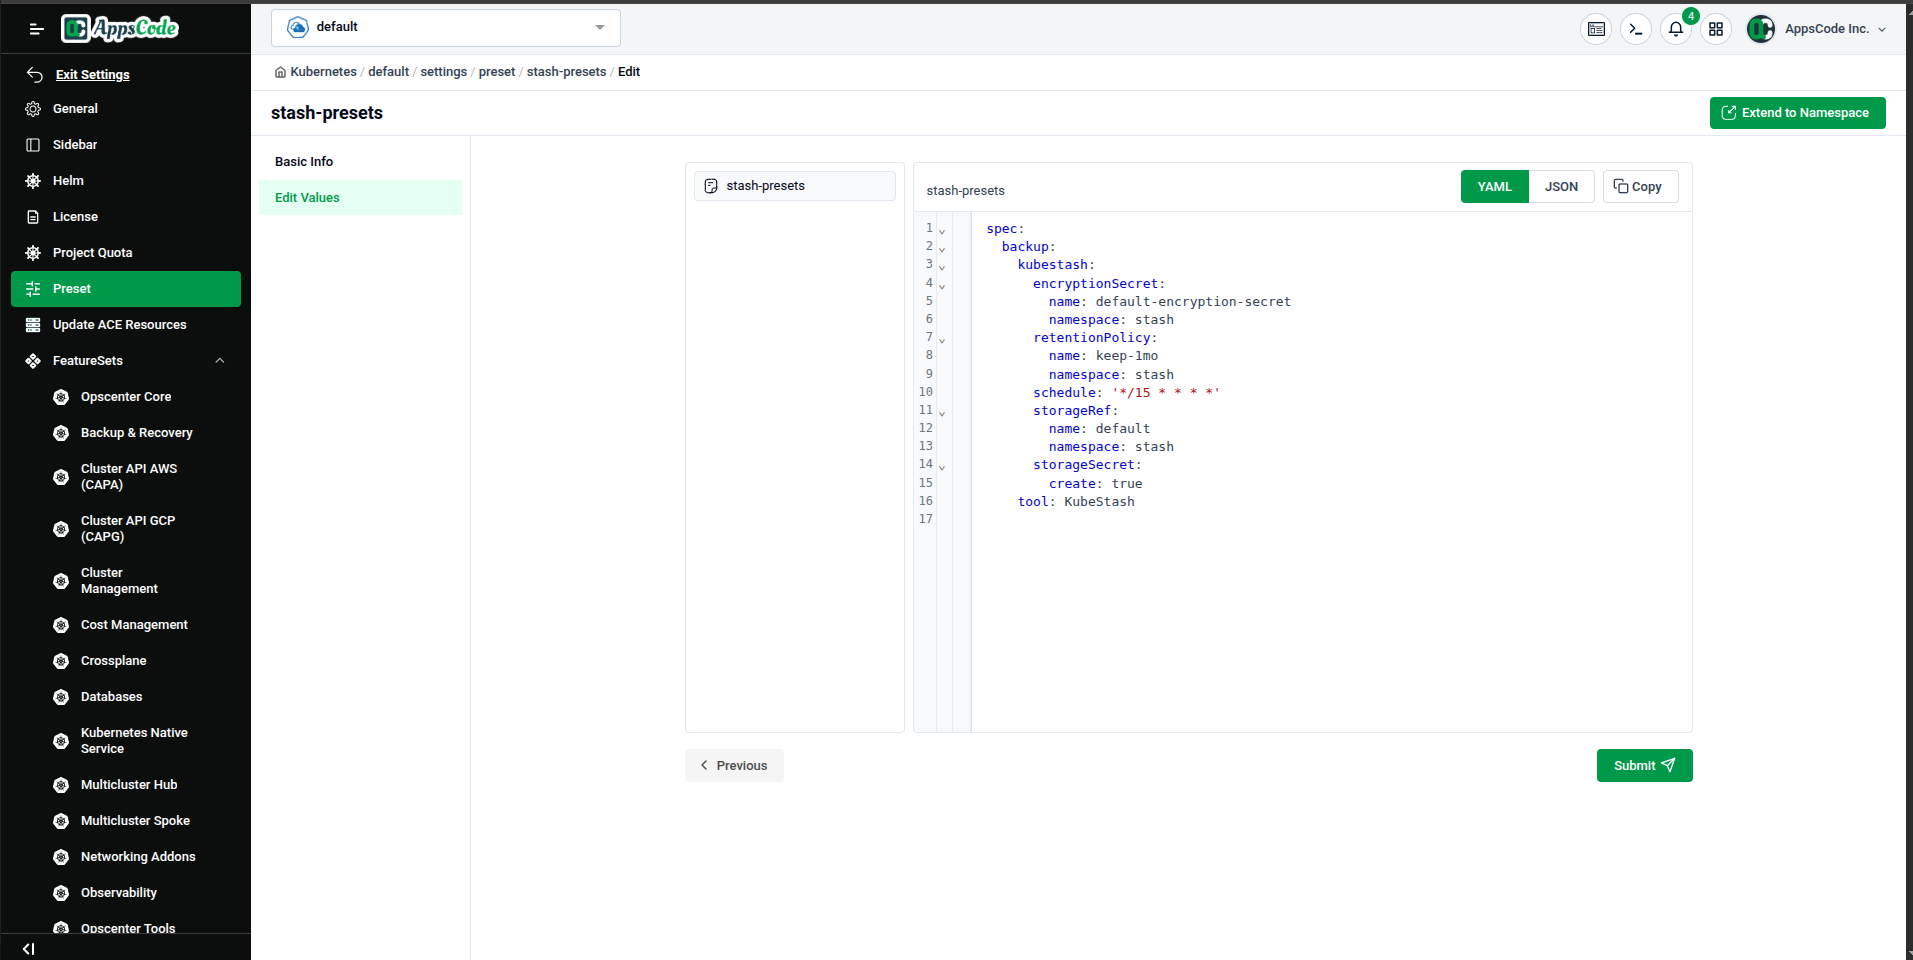
Preview the Generated YAML
After clicking Preview, the page displays the full generated stash-presets specification in YAML (or JSON) format on the right. You can directly edit this YAML or JSON.
Click Submit to apply the updated preset values to the cluster.
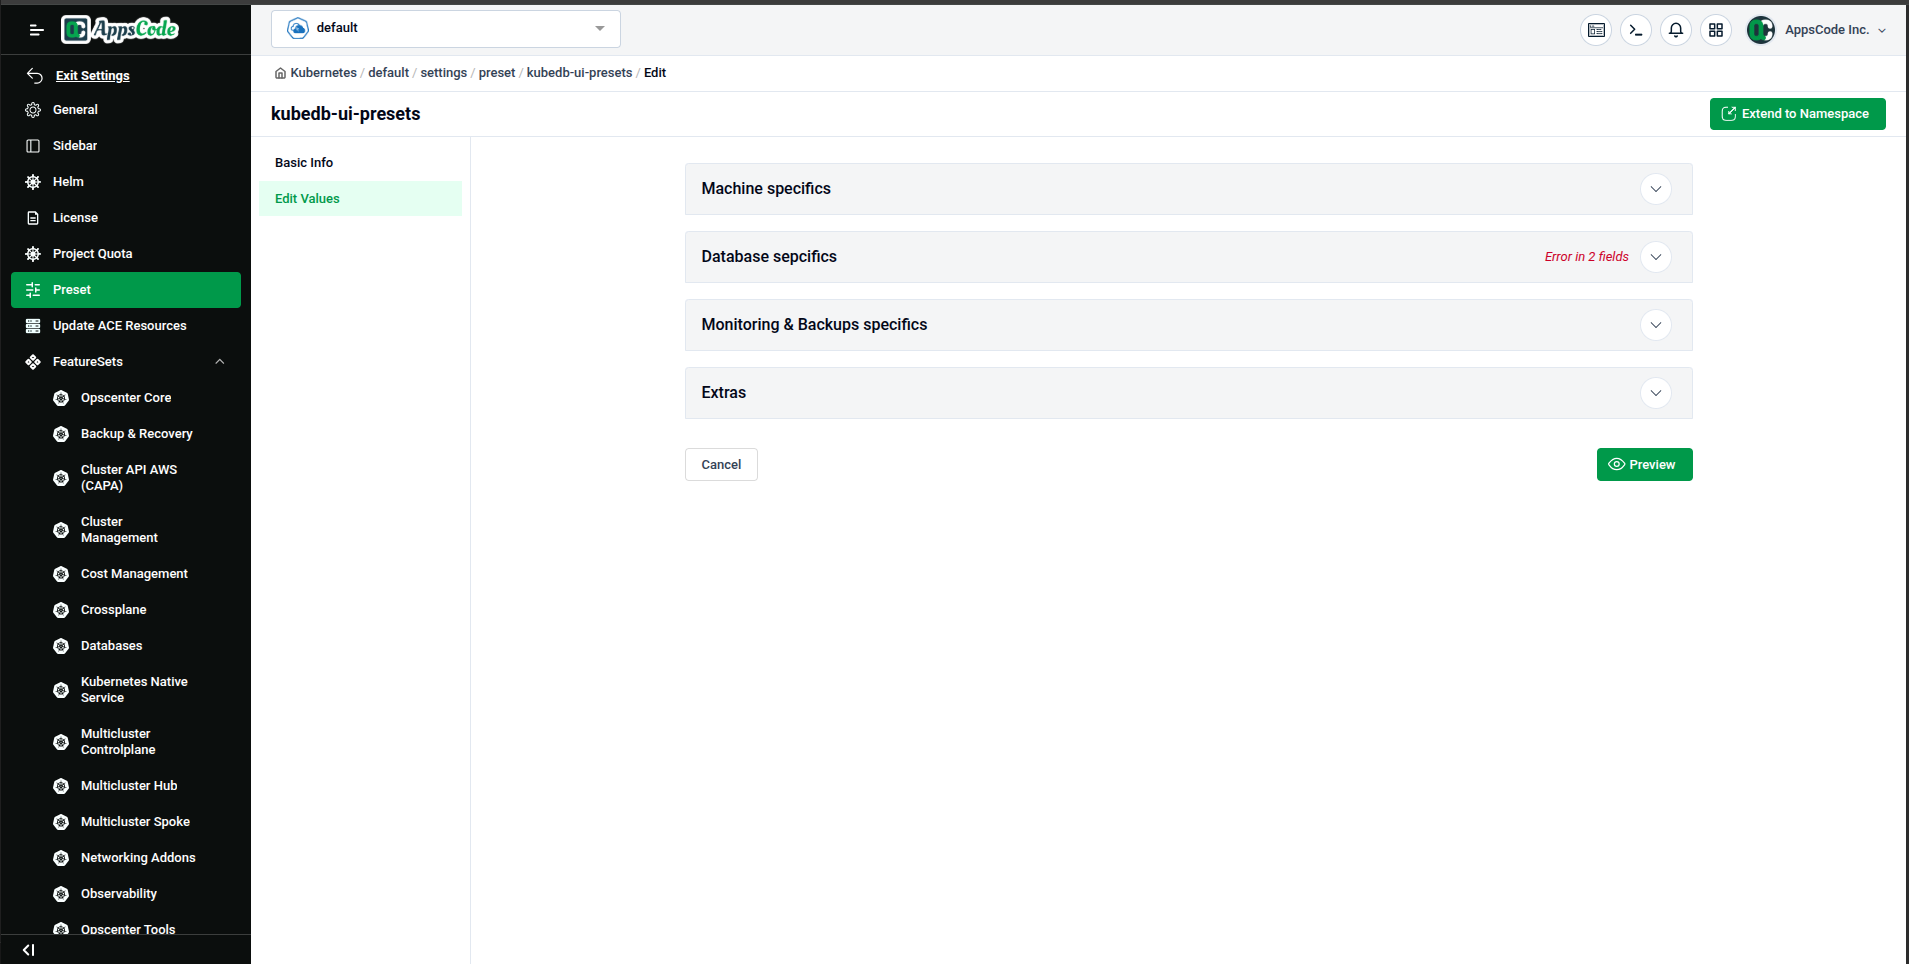
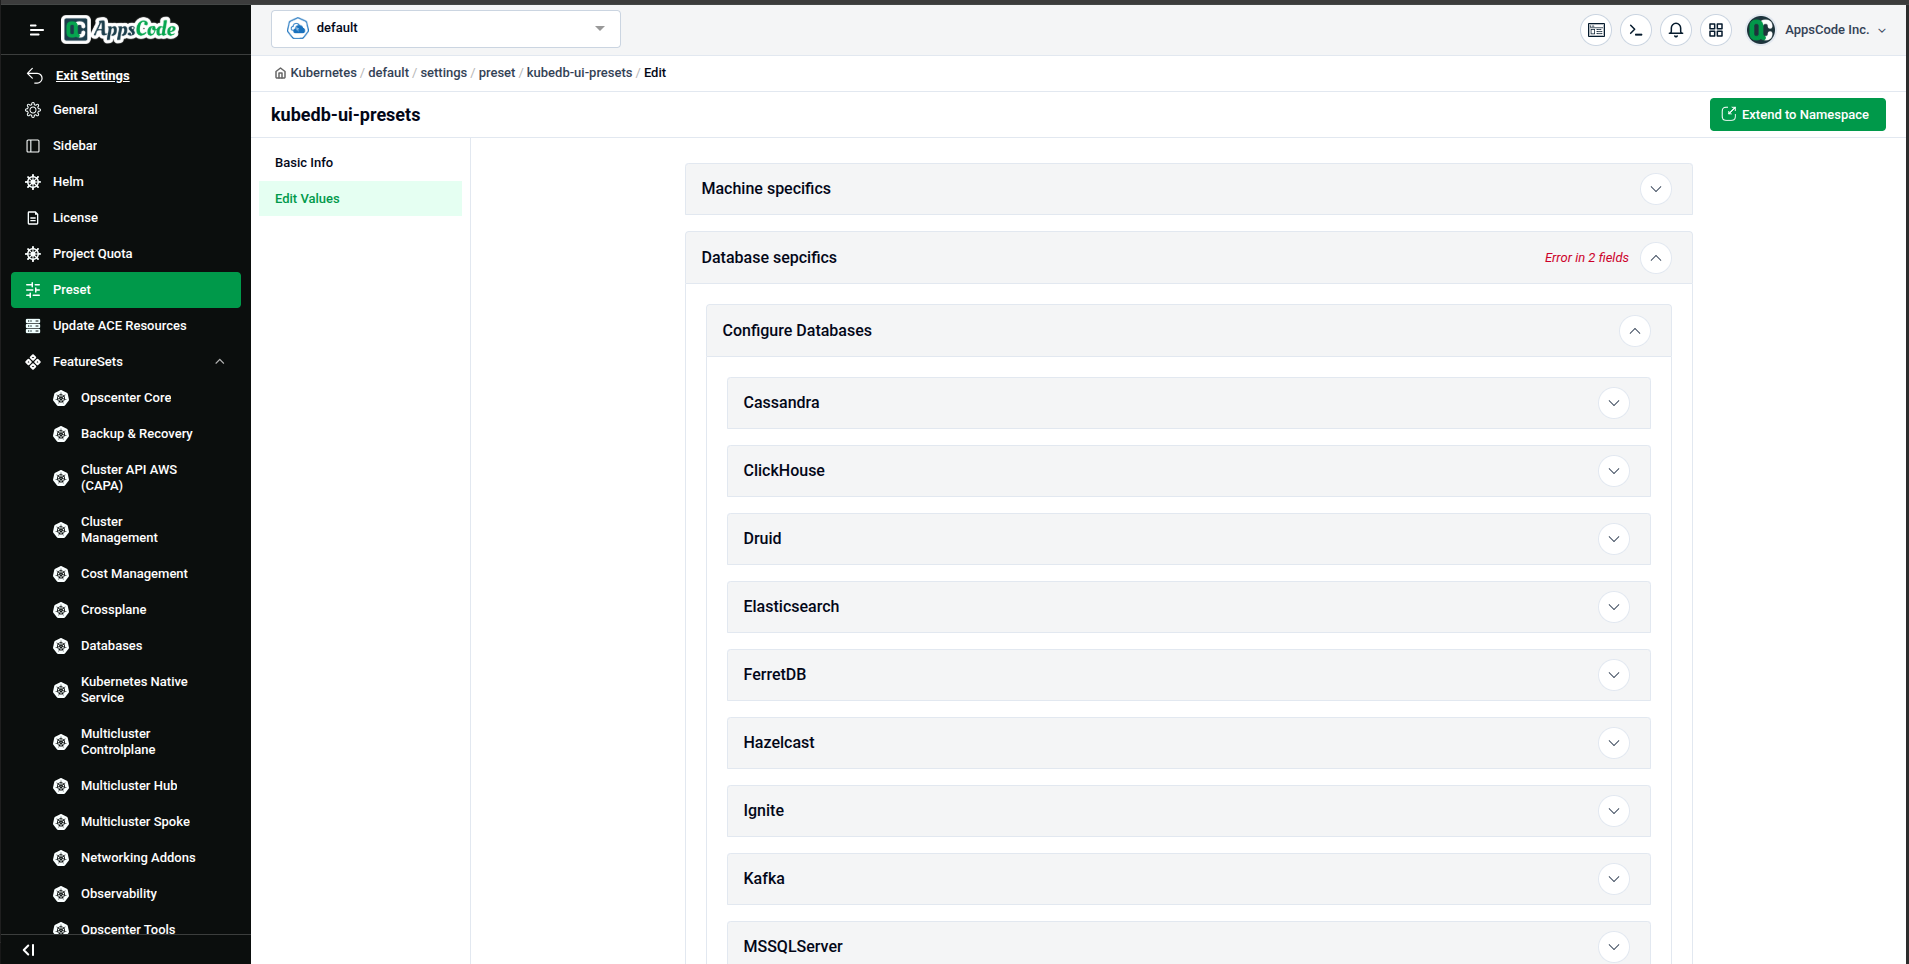
Step 4 — Edit KubeDB Presets
Click on the kubedb-ui-presets preset to open its detail page. Click the Edit Values tab in the left panel to modify the general KubeDB configuration.
The KubeDB preset configuration is organized into four main sections:
- Machine specifics — Configure deployment type (Shared/Dedicated), cluster tiers, and node topologies.
- Database specifics — Manage versions and modes for supported databases (Postgres, Redis, MongoDB, etc.), storage classes, and TLS settings.
- Monitoring & Backups specifics — Configure monitoring agents and default backup settings.
- Extras — Additional configuration fields.
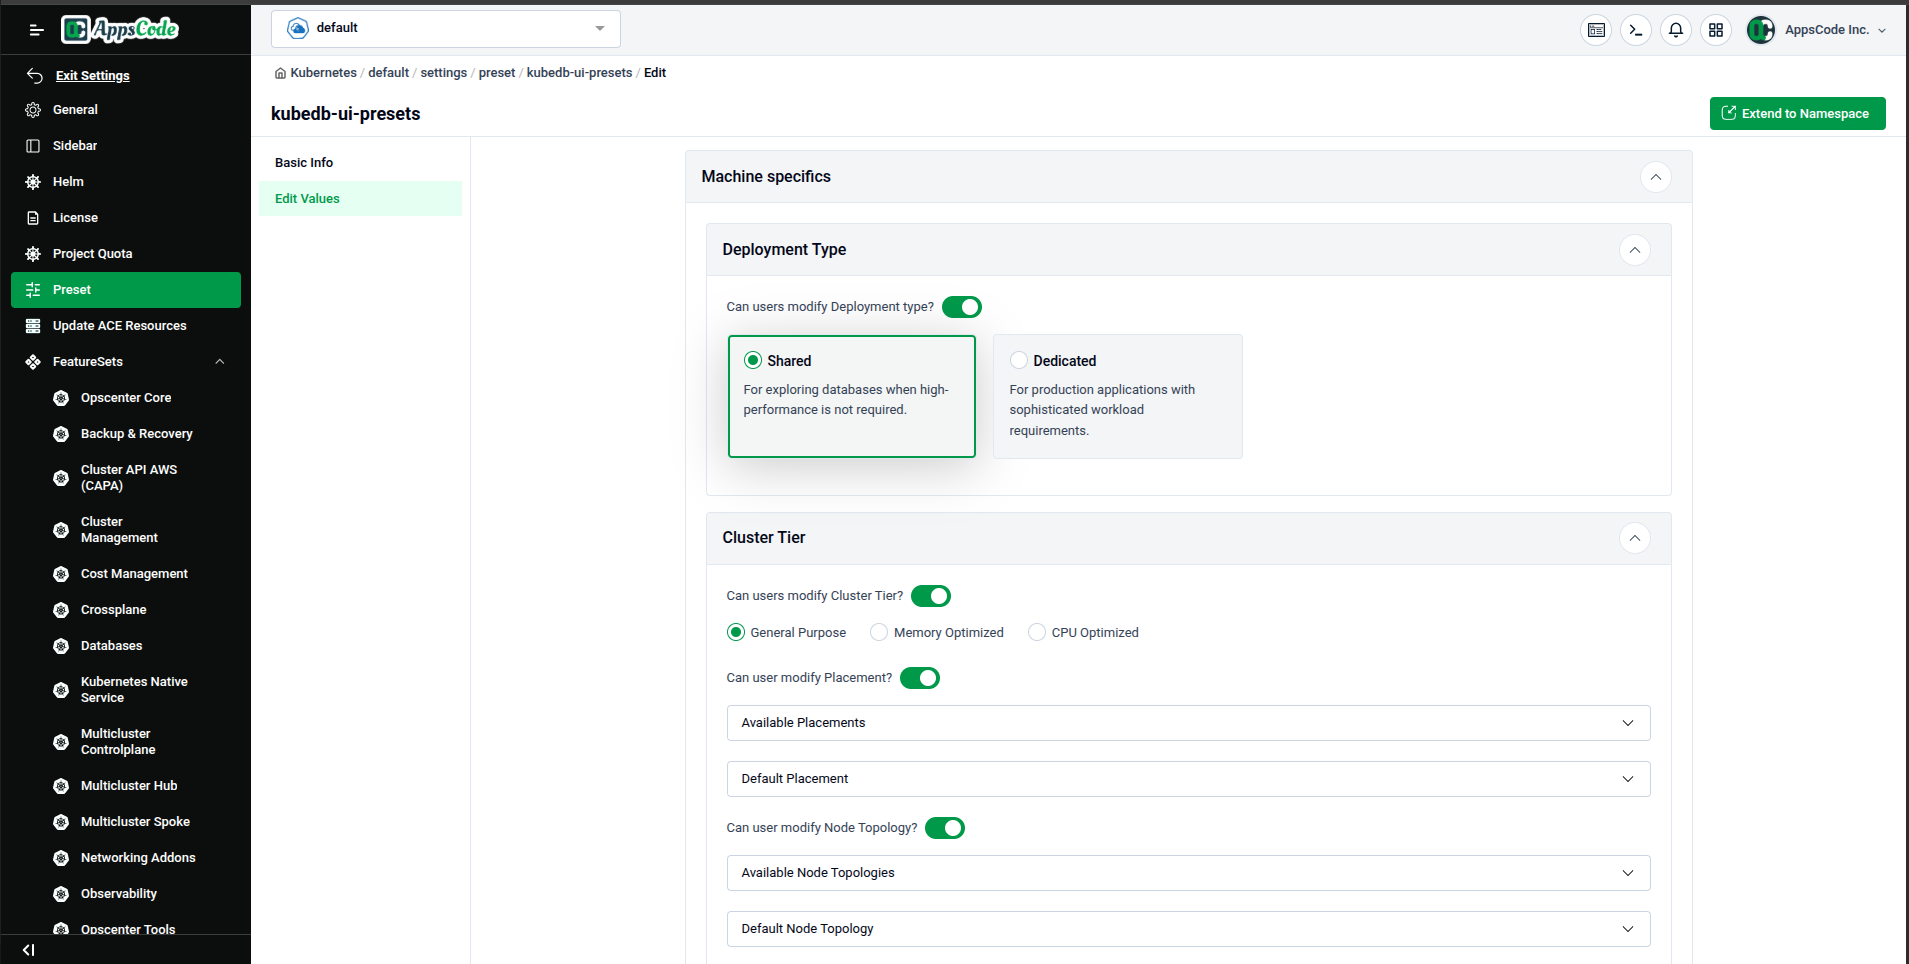
Machine Specifics
In this section, you can define if users are allowed to modify the deployment type, cluster tier, and node placement. You can also specify the available options and default values for these fields.
Database Specifics
The Database Specifics section is where you manage settings for different database engines. You can enable or disable specific versions and modes for each database type.
For example, in the Postgres subsection, you can toggle which versions (e.g., 13.x, 14.x) and modes (Standalone, Cluster) are available to users.
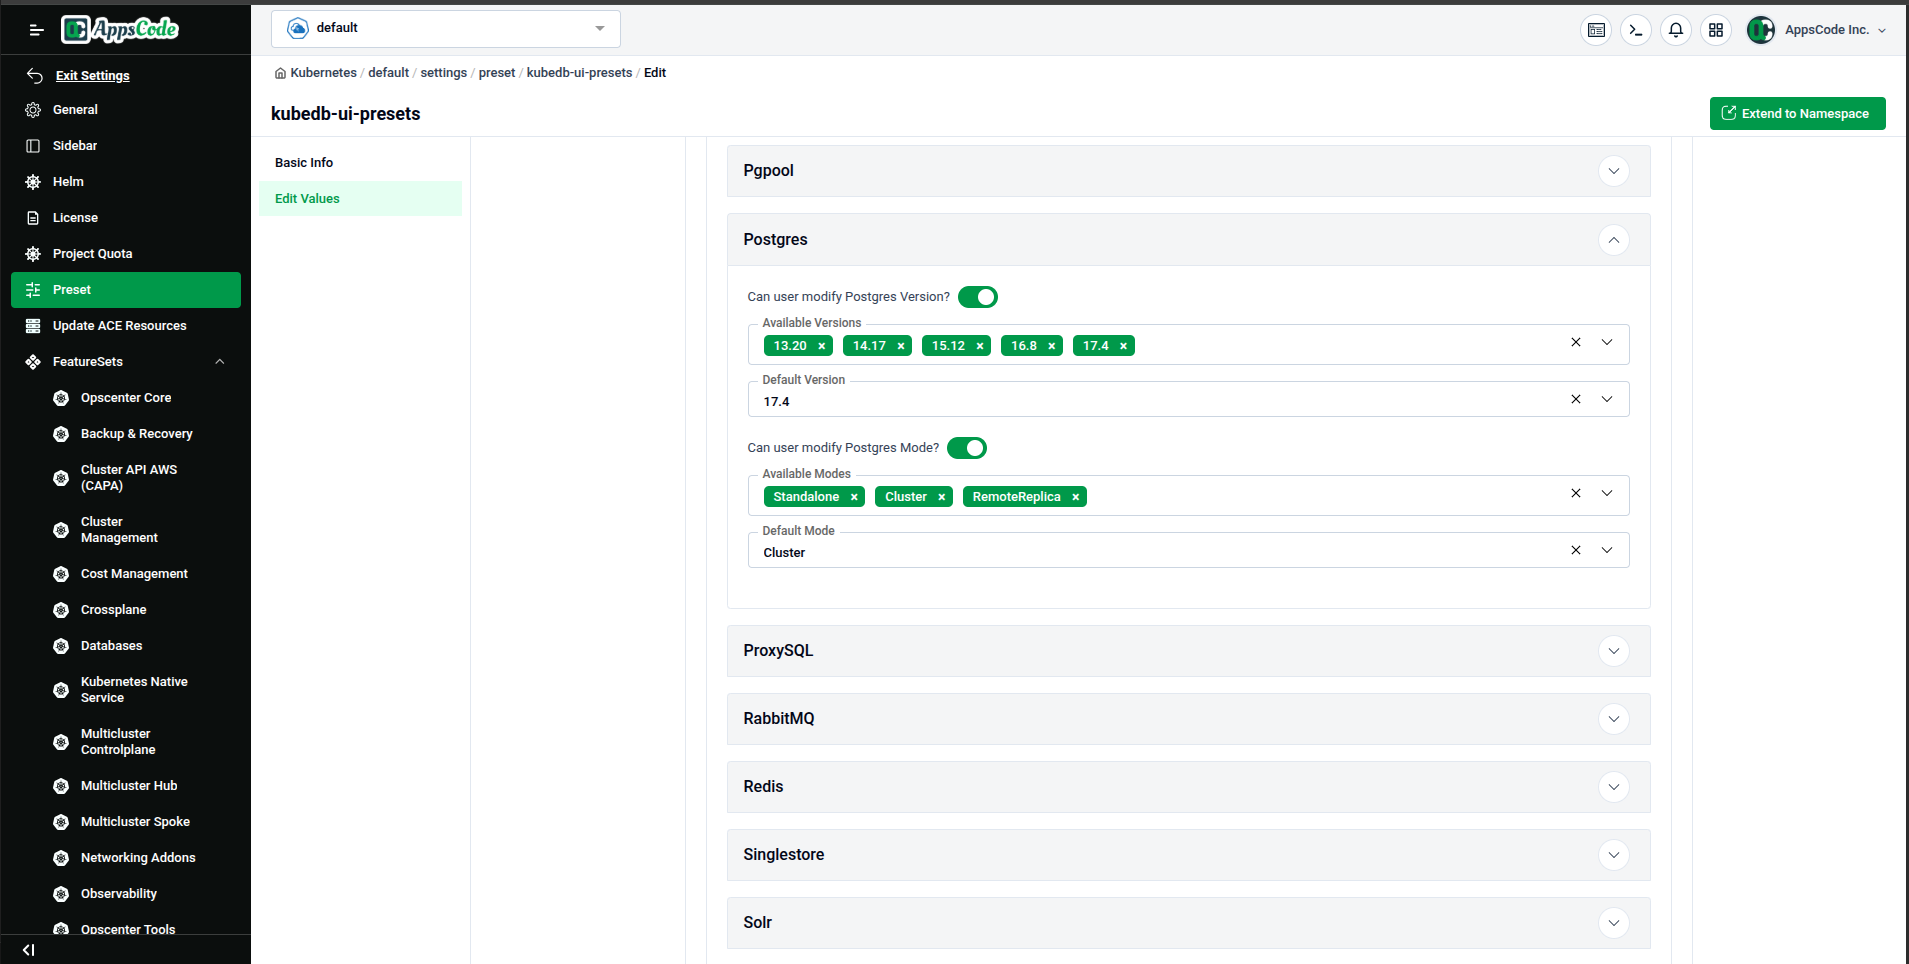
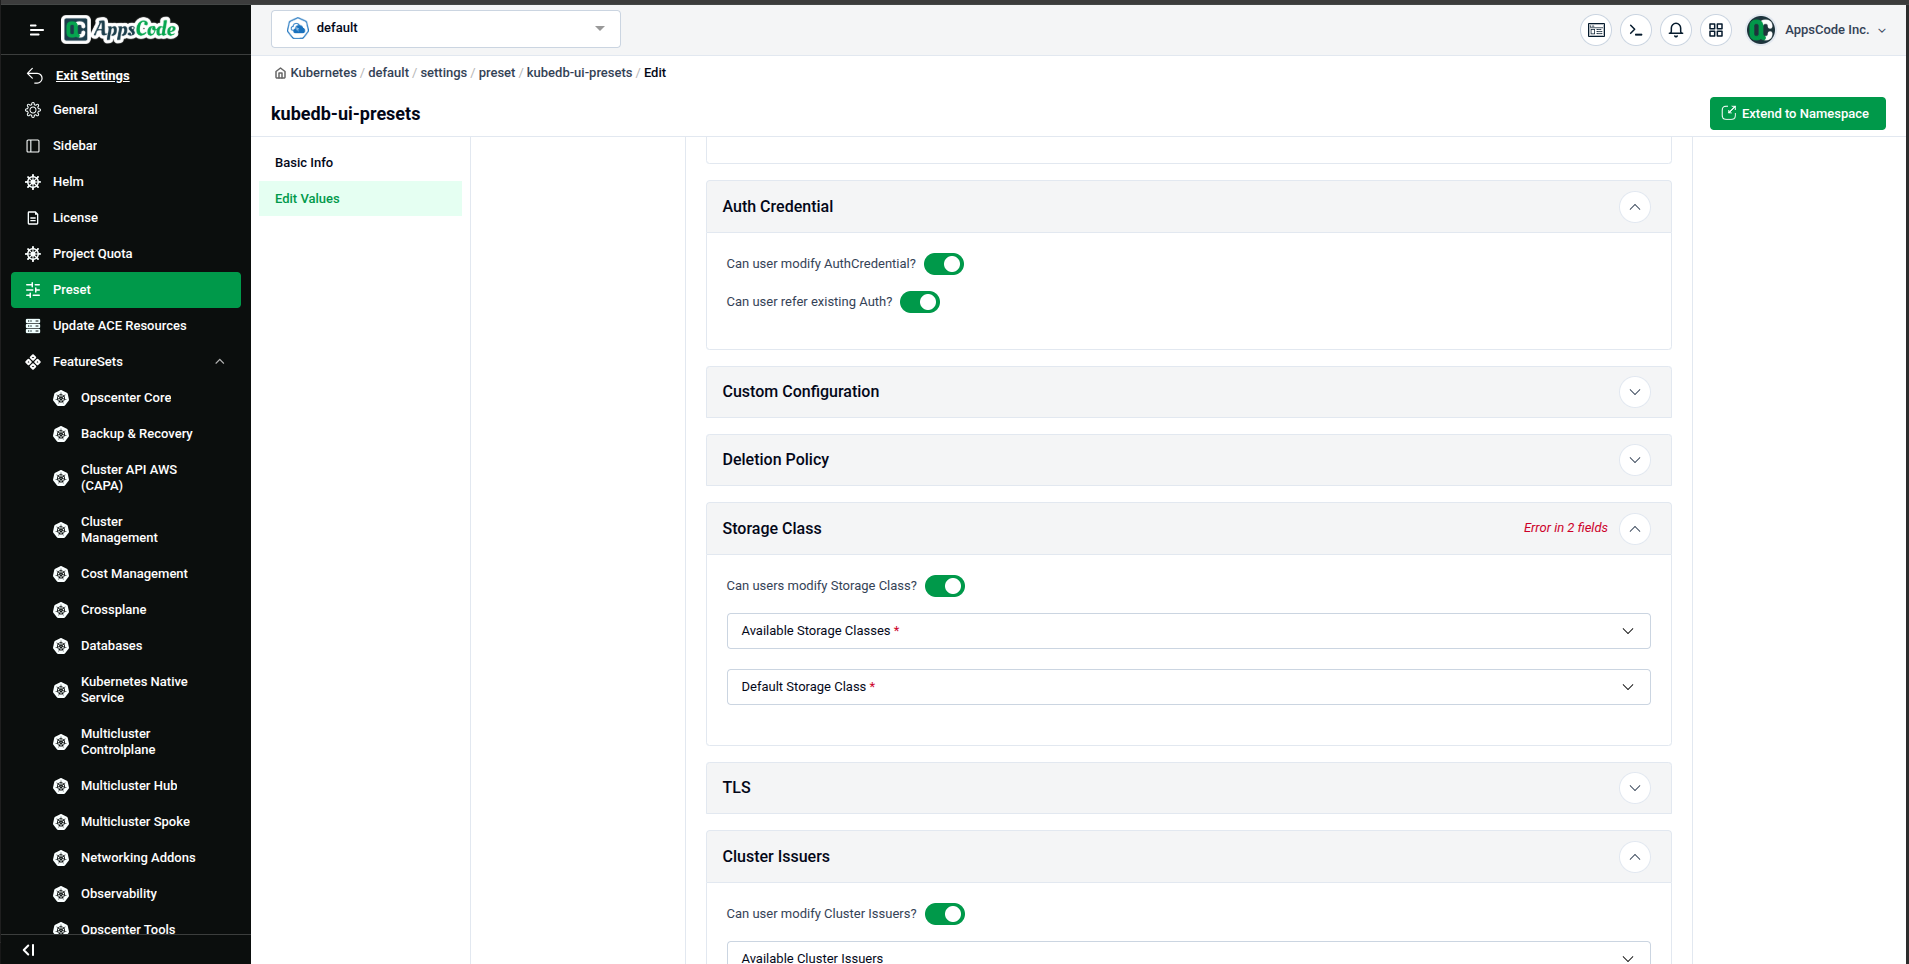
You can also configure default Auth Credentials, Storage Classes, and TLS settings that will be applied to new database instances.
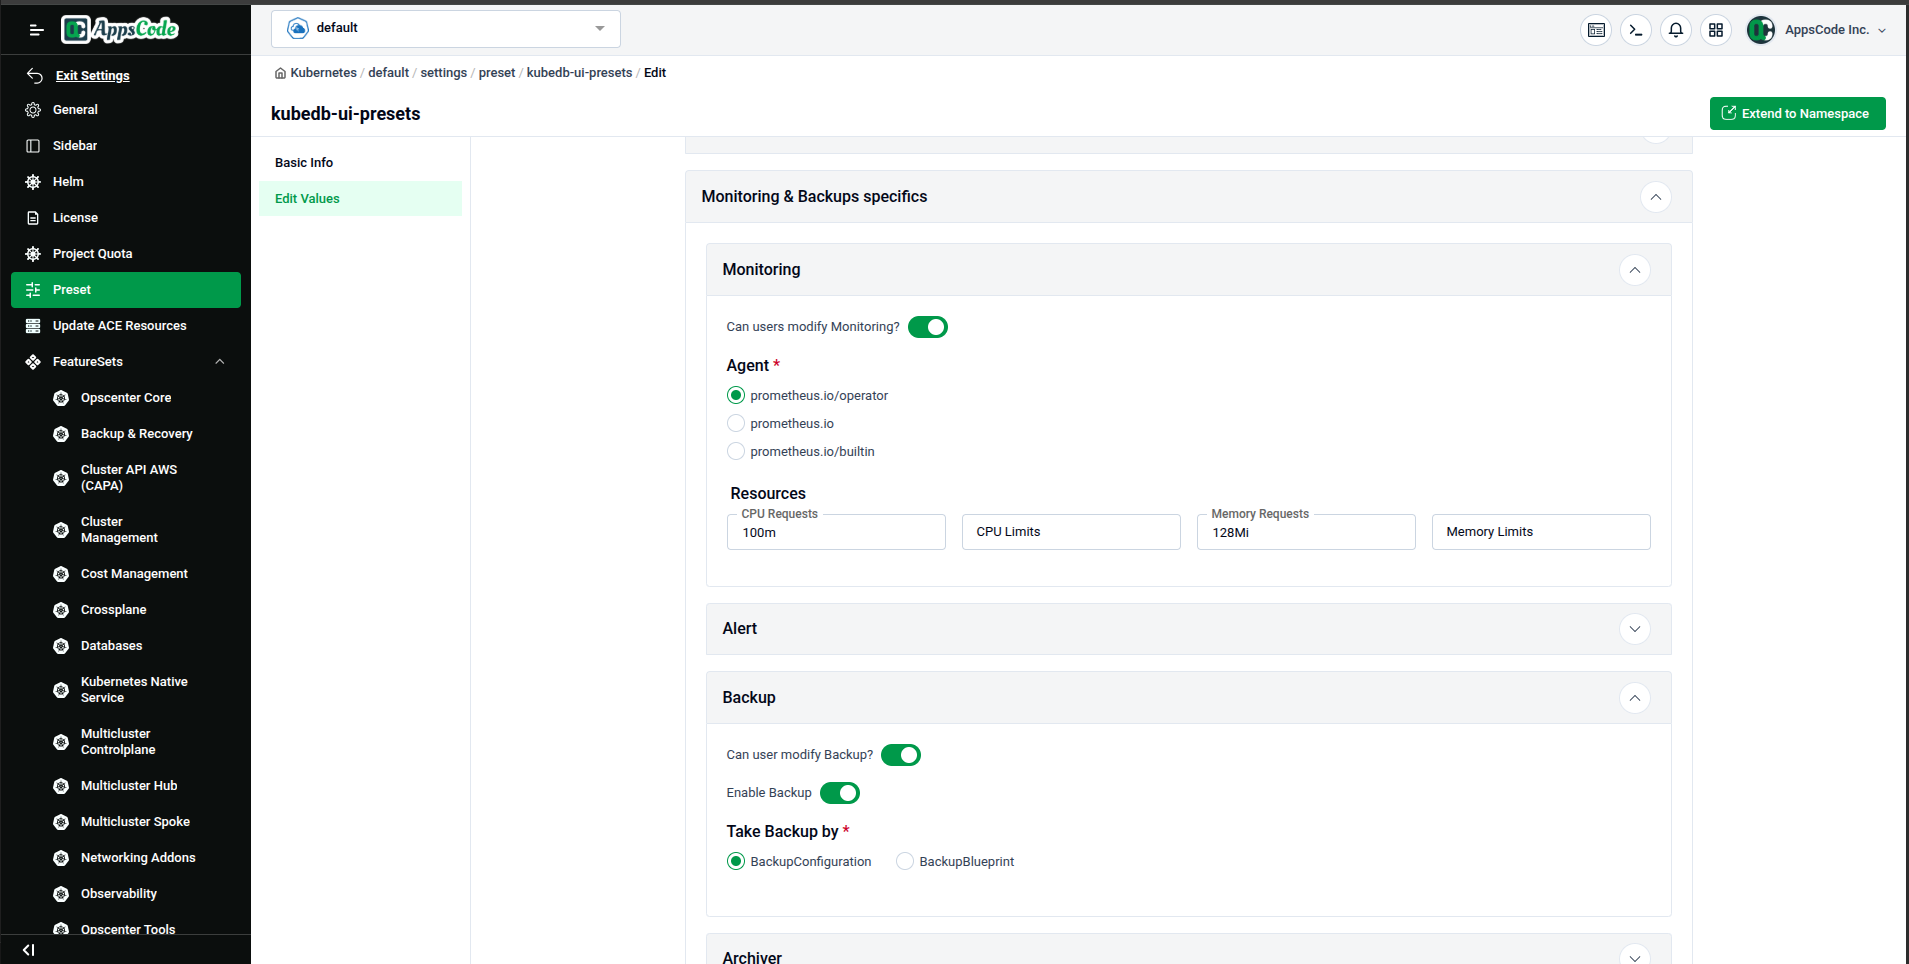
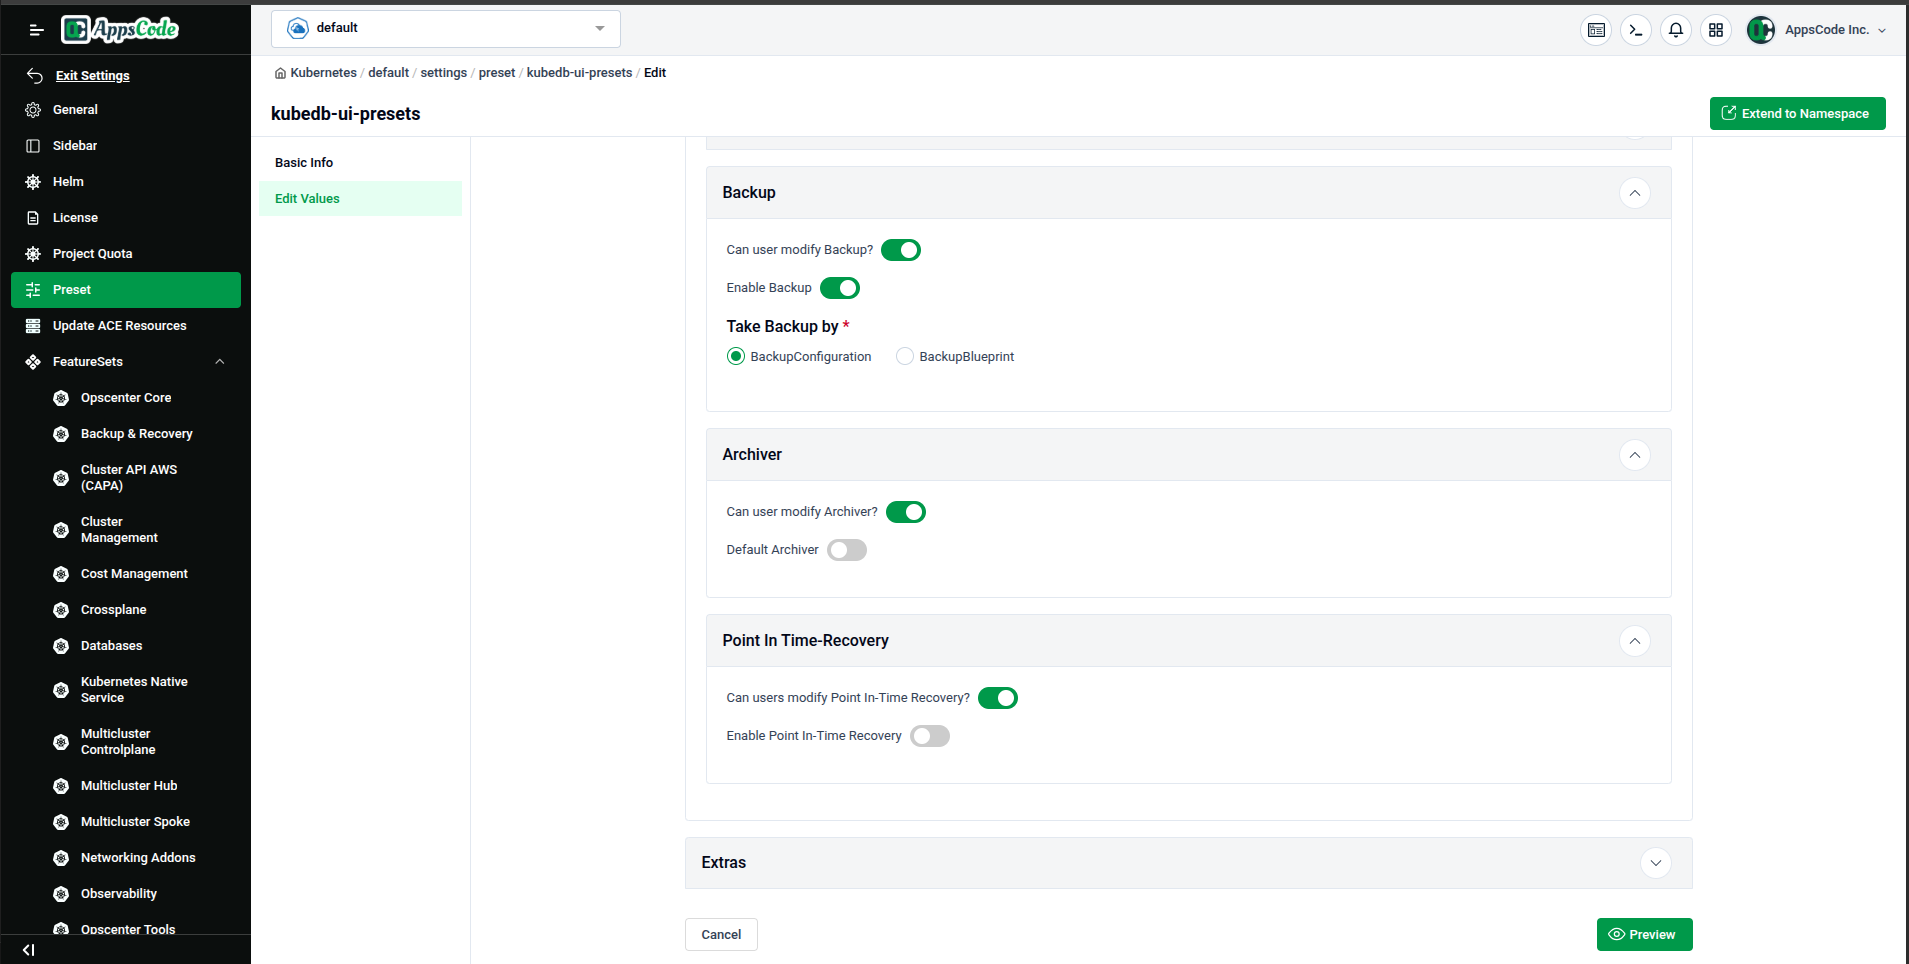
Monitoring & Backup Specifics
Configure the default monitoring agent and resources (CPU/Memory). You can also enable or disable backups by default and specify if they should be managed via BackupConfiguration or BackupBlueprint.
Preview and Submit
After completing your changes, click Preview to review the generated YAML specification.
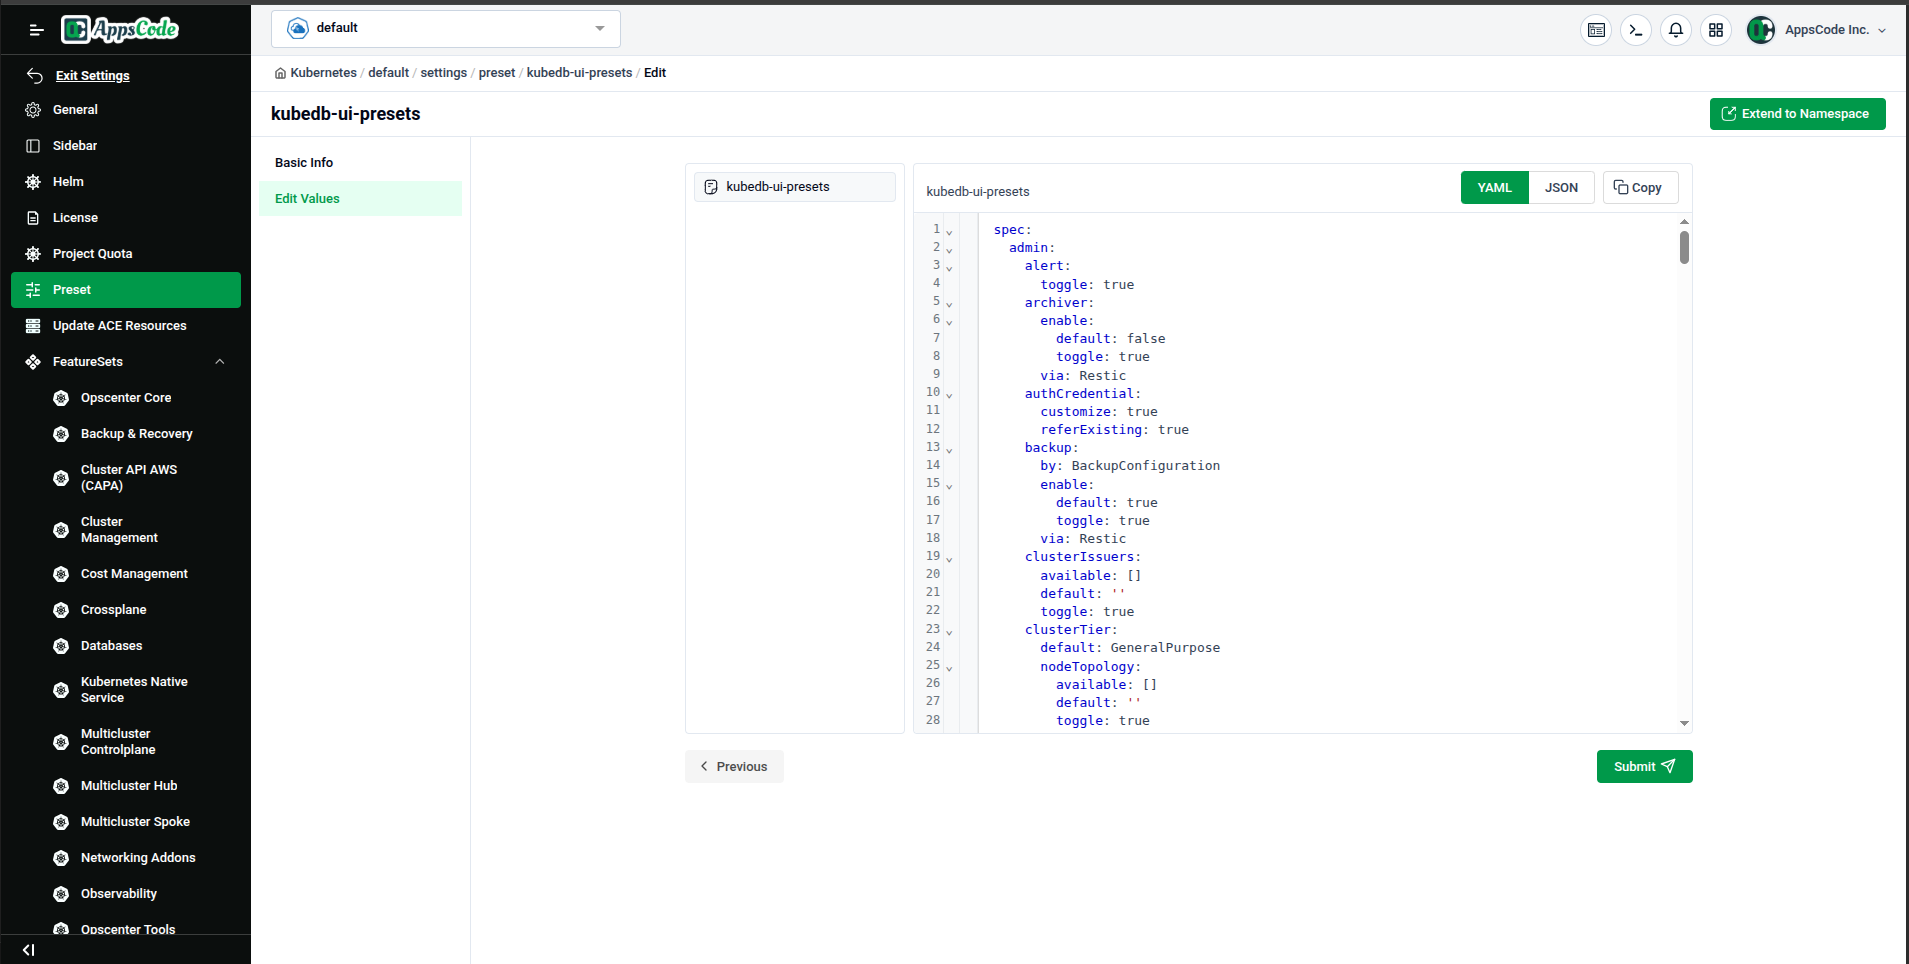
Click Submit to update the kubedb-ui-presets configuration in your cluster.
Step 5 — Extend a Preset to a Namespace
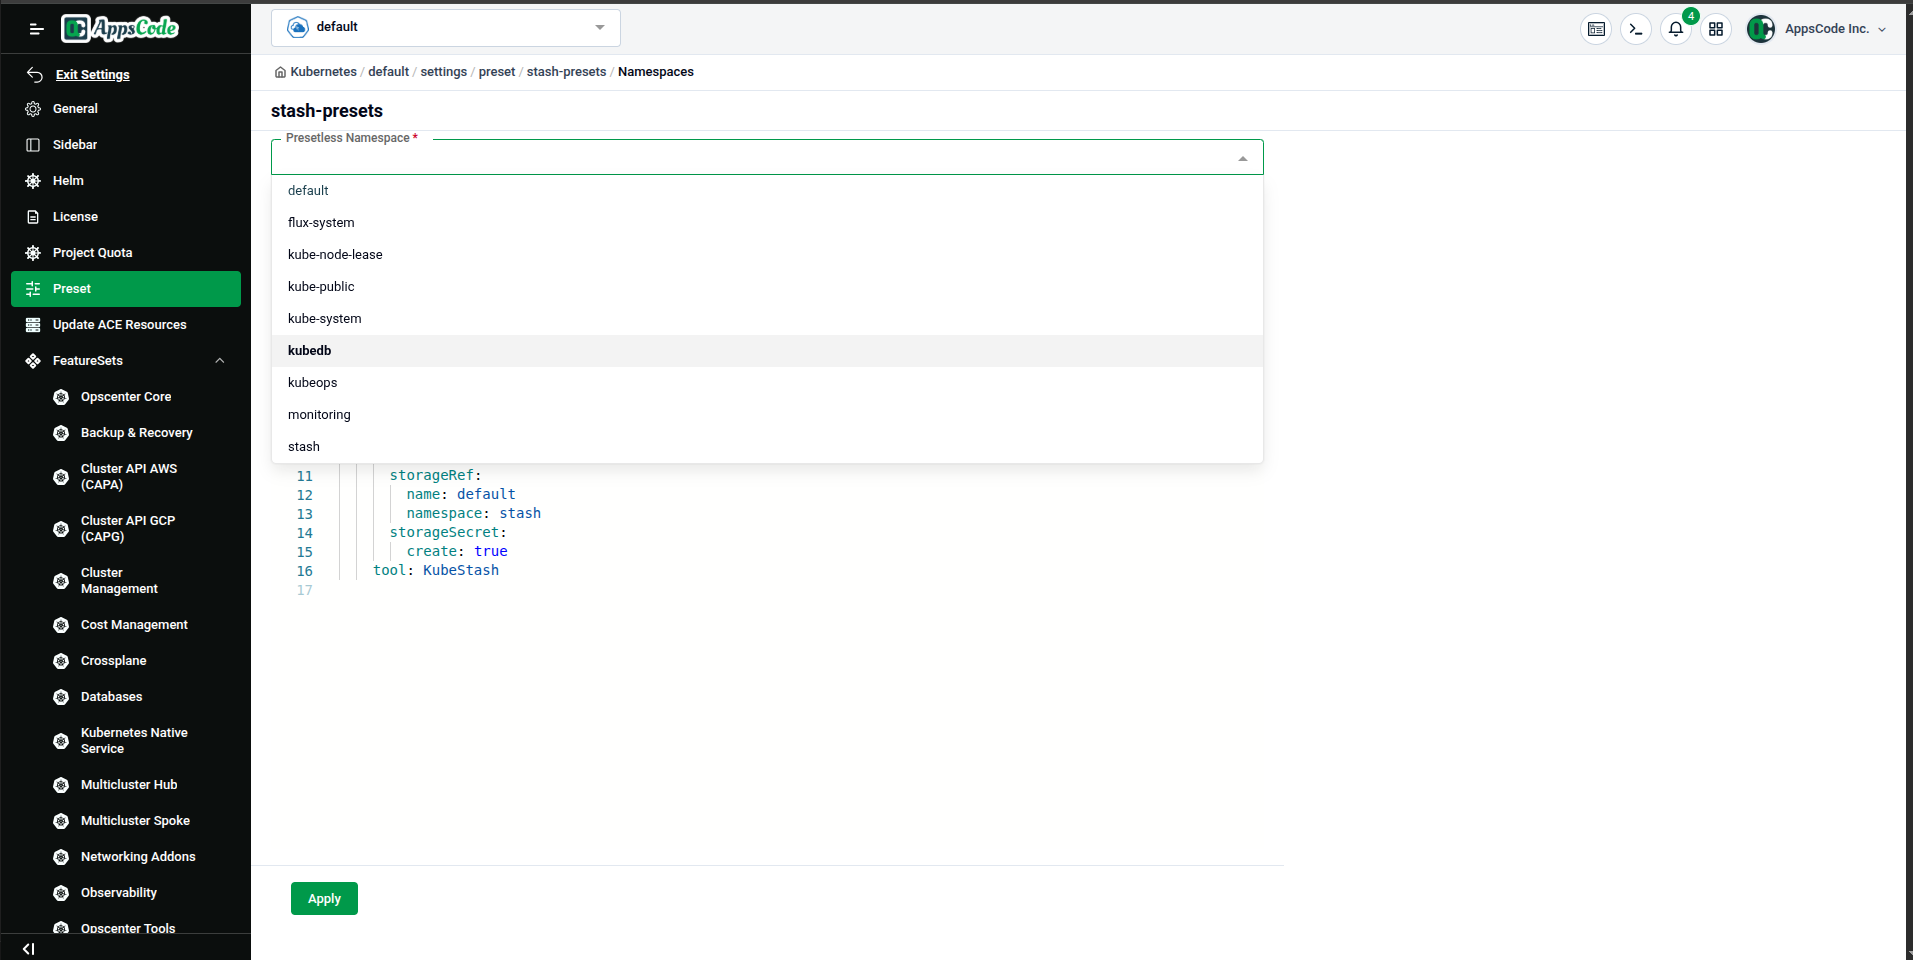
Presets can be scoped to specific namespaces so that workloads in those namespaces inherit the preset's configuration. To do this, click the Extend to Namespace button (top-right on the Preset Detail page).
A Presetless Namespace dropdown appears, listing all namespaces in the cluster that do not yet have a copy of this preset (e.g., default, kubedb, flux-system, kube-system, monitoring, etc.).
Select the target namespace from the list.
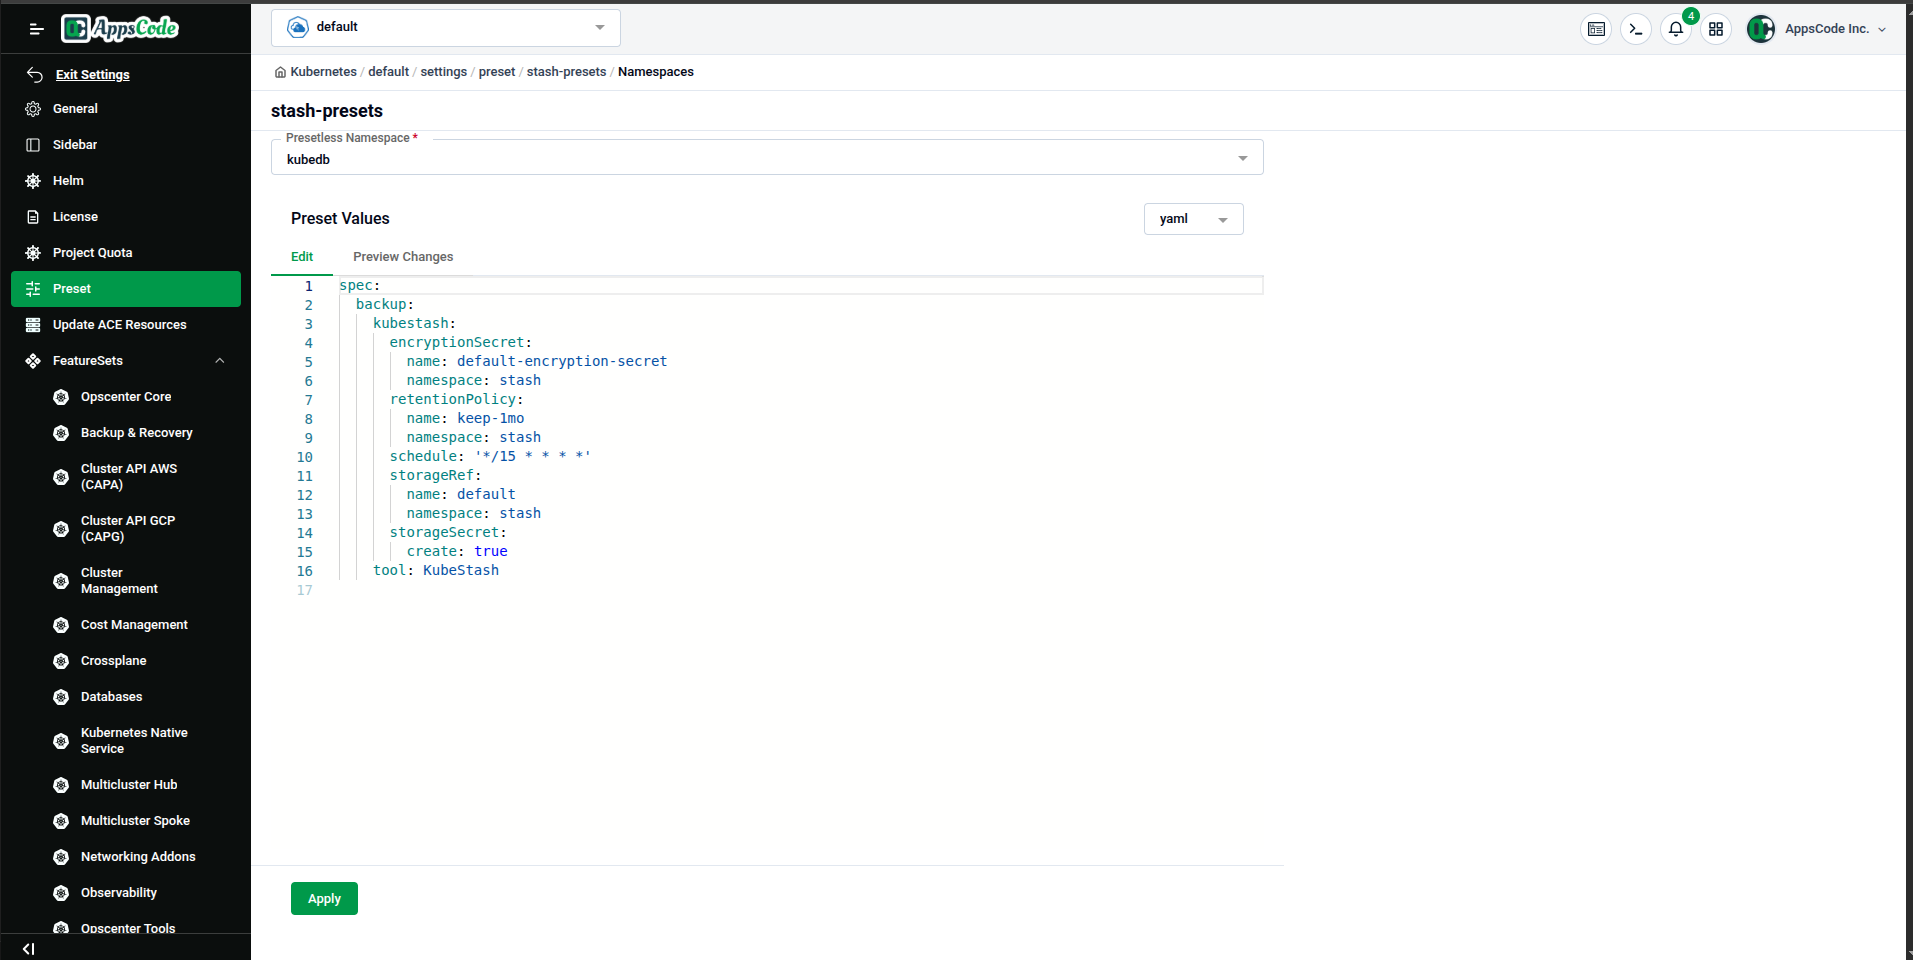
After selecting the namespace, a Preset Values editor appears (YAML/JSON). You can customize the values specifically for this namespace before applying. Click Apply to create the namespace-scoped preset copy.
Quick Reference
| Task | How to do it |
|---|---|
| View all presets | Left sidebar → Preset |
| Open a preset | Click the preset name in the list |
| Edit preset values | Preset detail → Edit Values tab → update fields → Preview → Submit |
| Apply to a namespace | Preset detail → Extend to Namespace → pick namespace → Apply |
| Check namespace copies | Preset detail → Basic Info → Namespace Presets table |