


Client Organization
A Client Organization provides logical separation between different clients sharing the same infrastructure, ensuring that one client cannot access or create resources (like databases) belonging to another. A central administrator manages multiple environments from a Hub cluster while each client gets a dedicated Spoke cluster for their own teams, workloads, and billing.
Prerequisites
Before creating a Client Organization, make sure the following are already in place:
- A Hub cluster is set up — See Create Hub & Spoke for the full setup guide.
- A Spoke cluster is connected to the Hub — The Spoke must be linked and accepted by the Hub administrator.
- The Spoke cluster is licensed — A valid license certificate must be applied to the Spoke. Without it, database features remain in a Warning state and the organization cannot be created. See License Management for details.
⚠️ Always perform these steps from an Organization/Work account. Personal accounts do not support Hub-Spoke features.
Creating the Client Organization
Once your Hub is ready and your Spoke is licensed, you can create the organization.
Note: Make sure the user who will be the organization admin already exists. If not, create one first via SITE ADMINISTRATION > User Accounts.
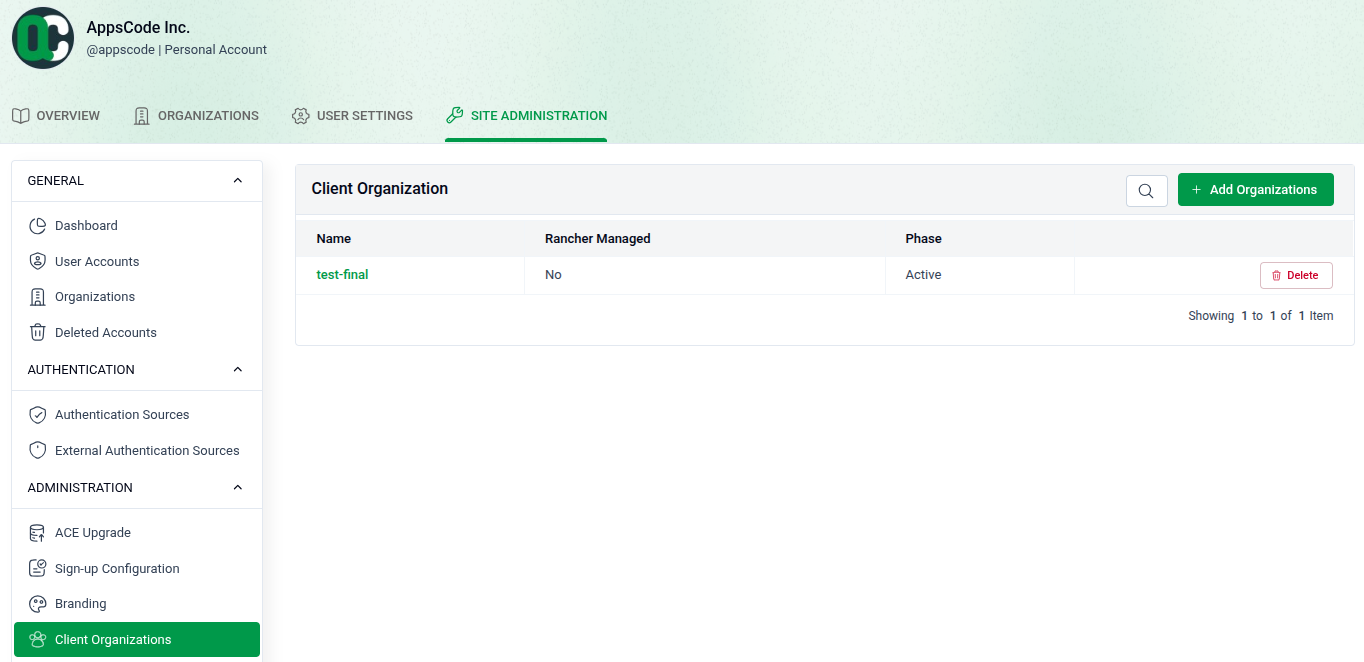
Go to USER SETTINGS > Client Organizations and click + Add Organization.
Step 1 — Basic Info
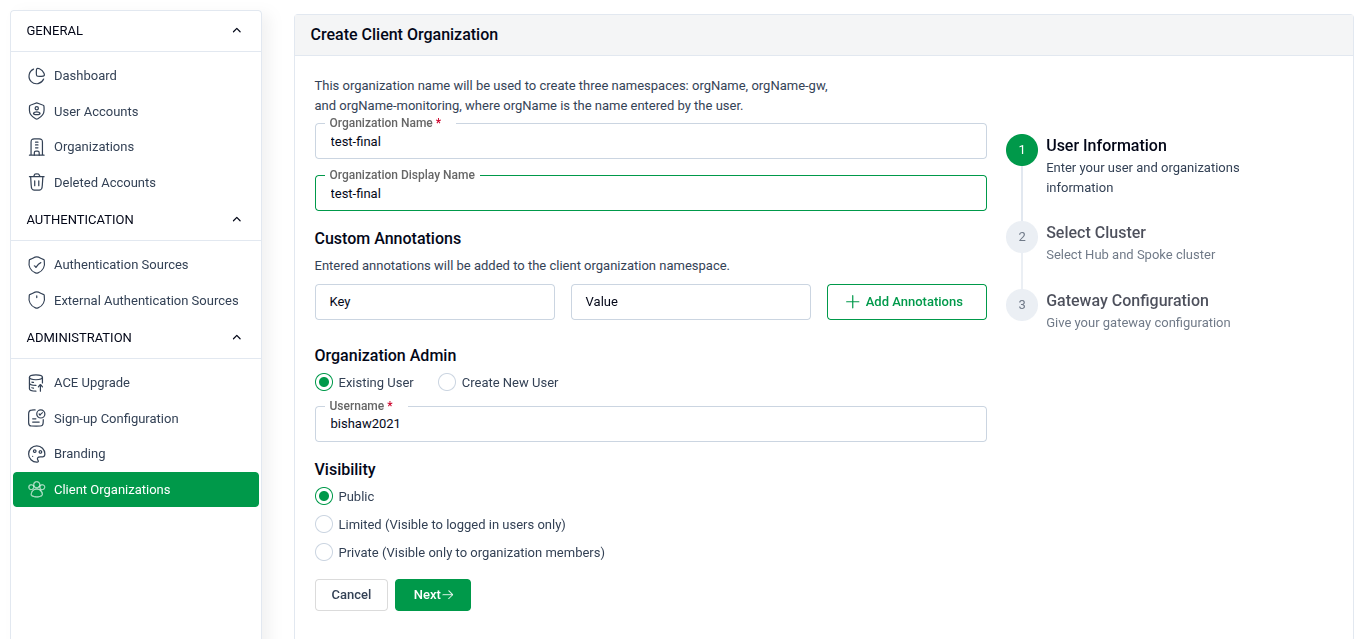
- Organization Name: Enter a display name for the organization (e.g.,
test-final). - Custom Annotations: Optionally add key-value annotations applied to the organization's namespace.
- Organization Admin: Select an existing user who will own and manage this organization (e.g.,
bishaw2021). - Visibility: Choose Public or Private (members only).
- Click Next to continue.
Step 2 — Select Cluster
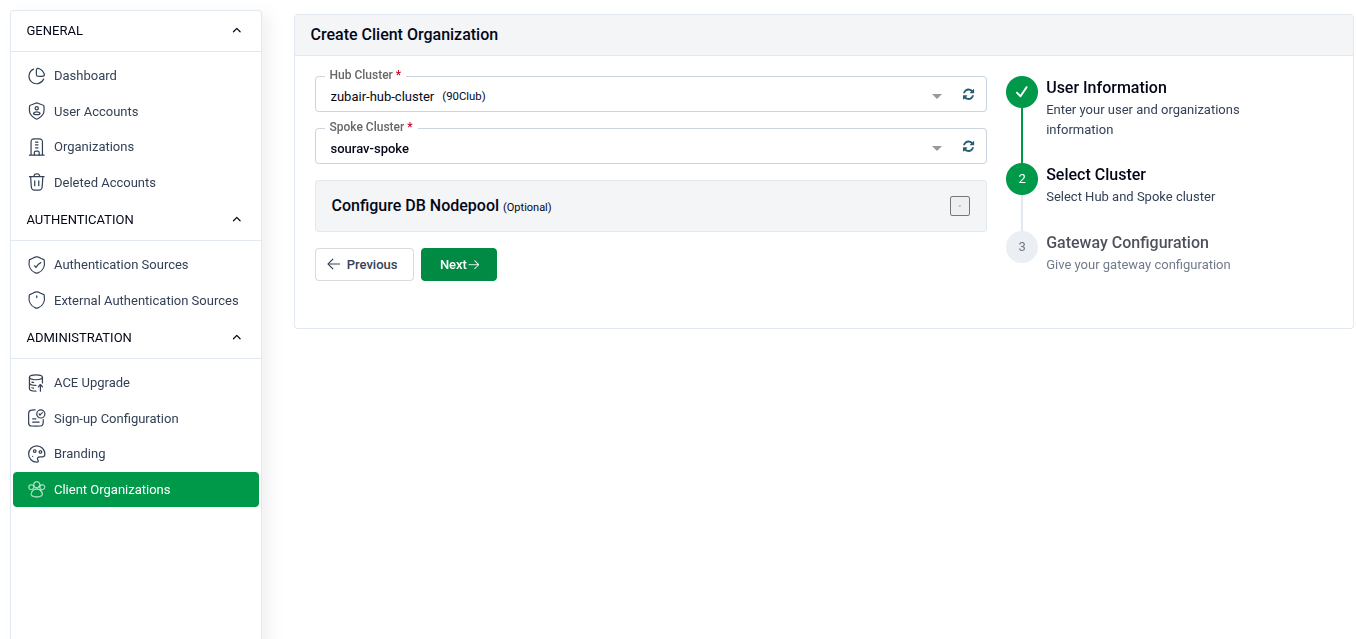
- Hub Cluster: Select the Hub cluster to use as the management plane.
- Spoke Cluster: Select the licensed Spoke cluster where the organization's workloads will run.
- Configure DB Nodepool (Optional): Add Labels and Tolerations to restrict the organization's databases to specific nodes, ensuring physical isolation from other clients.
- Click Next to continue.
Step 3 — Gateway Configuration
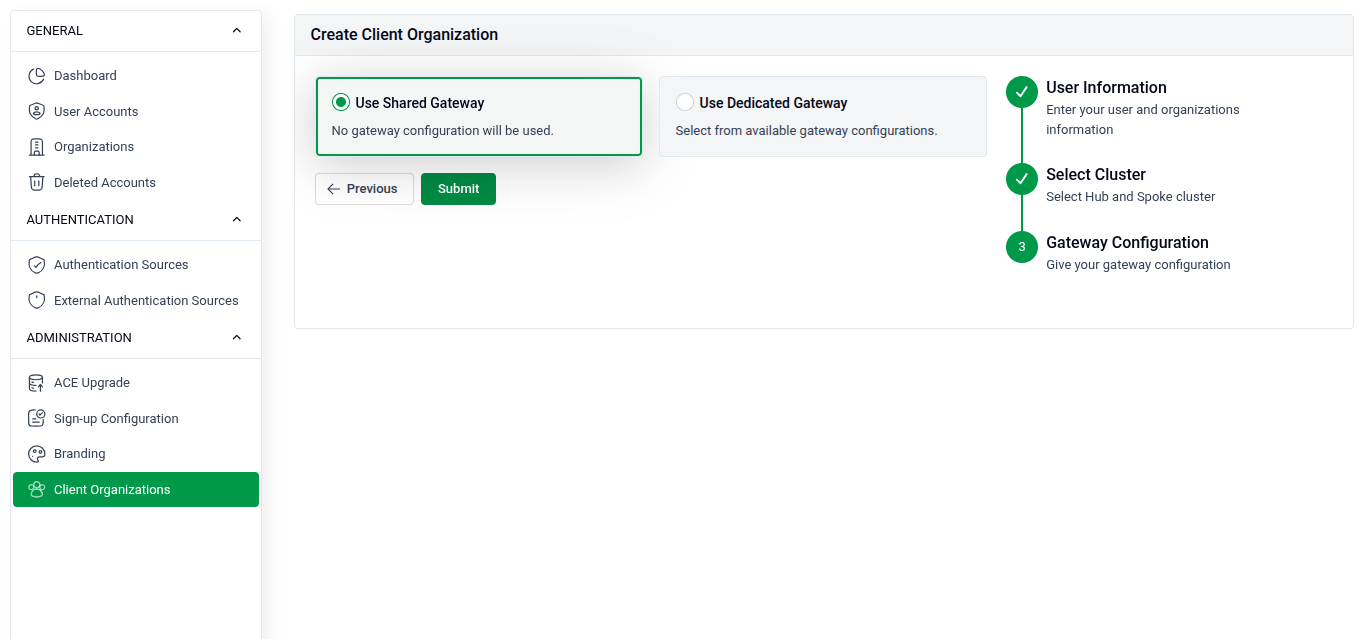
- Use Shared Gateway: No dedicated gateway configuration is applied. The organization shares the existing gateway.
- Use Dedicated Gateway: Select from available gateway configurations to assign a dedicated gateway for this organization.
- Click Submit to create the organization.
Verification
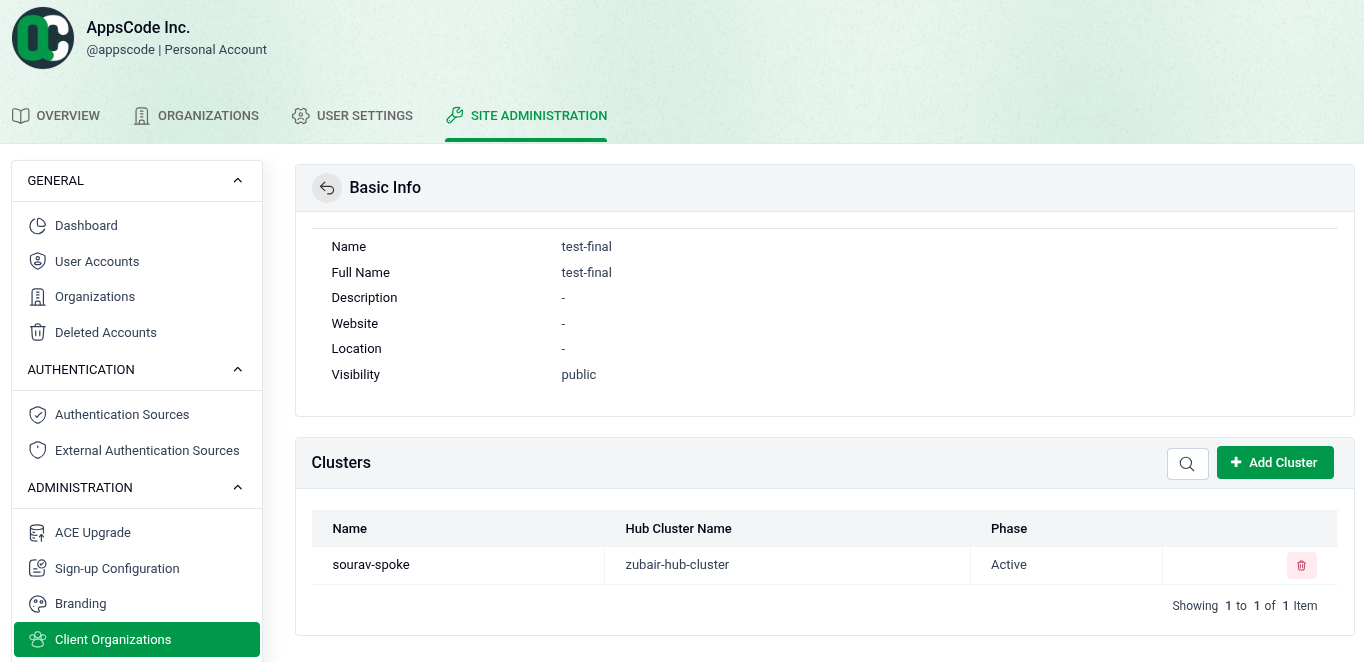
After submission, the organization is created and visible in the list. Clicking on it shows its details — including the assigned Spoke cluster and its status.
The organization admin, when logged in, will only see their assigned namespaces and Spoke cluster — fully isolated from other clients on the Hub.