


Scaling Databases
This guide explains how to use the Scale Vertically interface to adjust the computational resources and replica count of your database. Three scaling approaches are available — Vertical Scaling for manual CPU and memory adjustments, Compute Autoscaling for policy-driven automatic resource management, and Horizontal Scaling for changing the number of database replicas.
1. Getting Started
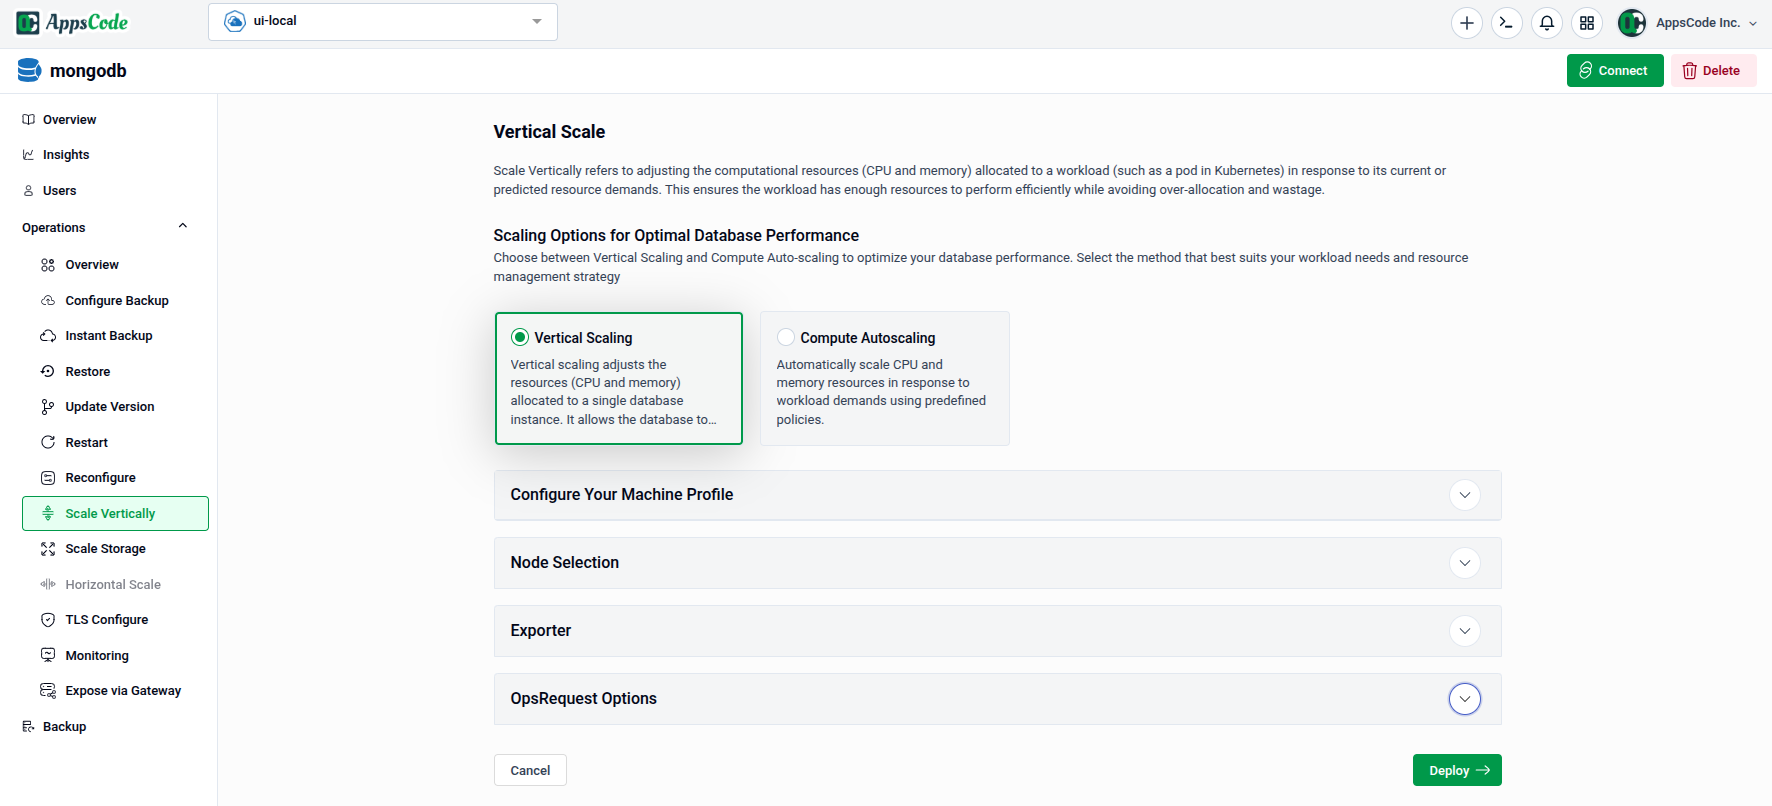
To begin, select Scale Vertically from the Operations section in the left sidebar.
You will land on the scaling form, which shows two method cards at the top:
- Vertical Scaling — Manually adjust CPU and memory allocated to your database nodes.
- Compute Autoscaling — Automatically scale CPU and memory in response to workload demands using predefined policies.
Below the method cards, the form contains sections for Configure Your Machine Profile, Node Selection, Exporter, and OpsRequest Options.
2. Vertical Scaling
Use this method to manually set the CPU and memory resources for your database nodes.
2.1 - Configure Your Machine Profile
The Configure Your Machine Profile panel lets you compare your current resource allocation with the proposed new configuration before applying it.
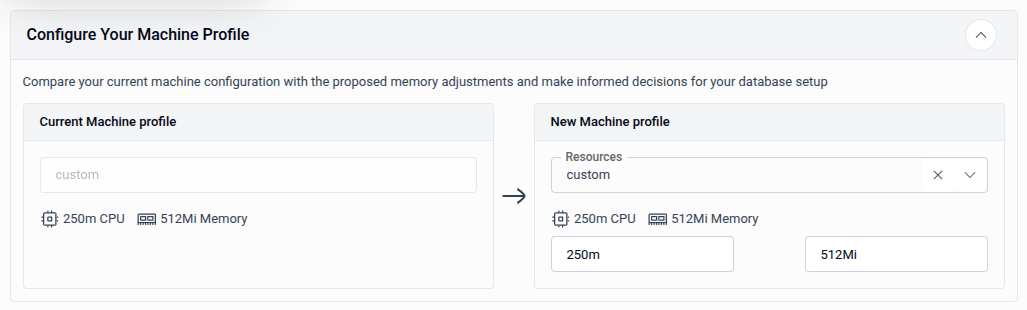
- Current Machine Profile — Displays the existing CPU and memory allocation (read-only, shown for reference).
- New Machine Profile — Select a preset resource profile from the Resources dropdown, or choose custom to enter CPU and Memory values manually.
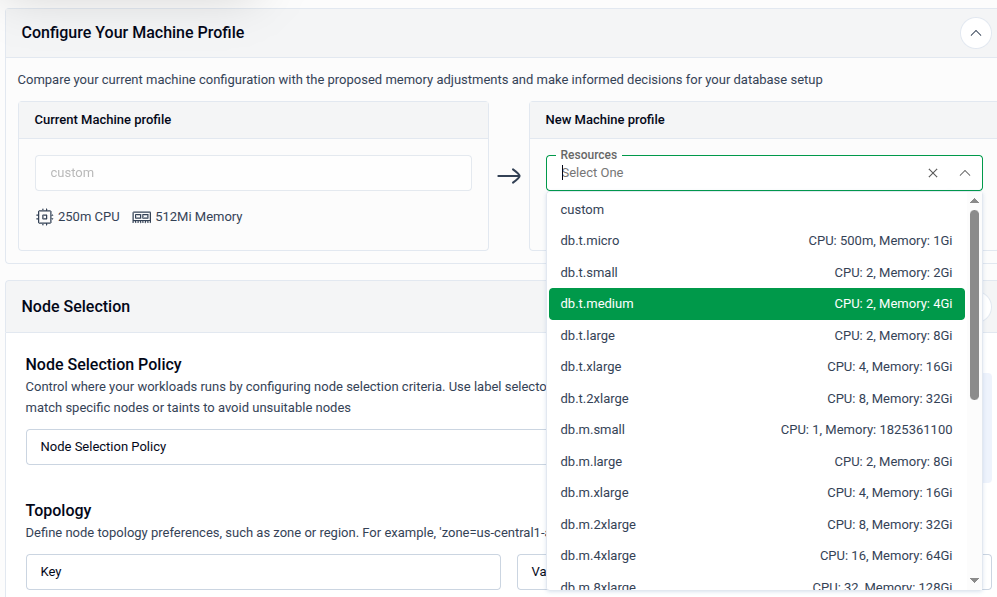
Tip: Use a preset profile for common workload sizes. Switch to custom if you need precise control over CPU and memory values beyond the available presets.
2.2 - Node Selection
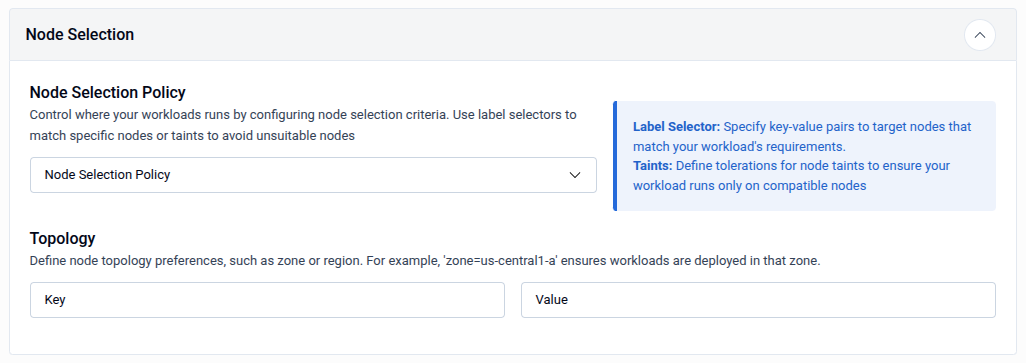
The Node Selection panel controls which Kubernetes nodes the database pods are scheduled onto after scaling.
| Field | Description |
|---|---|
| Node Selection Policy | Choose a policy to control node targeting — use Label Selector to match nodes by key-value labels, or Taints to define tolerations that allow pods to run on tainted nodes. |
| Topology - Key | The node label key used to define a topology domain (e.g., zone). |
| Topology - Value | The value for the topology key (e.g., us-central1-a). Workloads will be deployed in nodes matching this topology. |
2.3 - Exporter
The Exporter panel sets the CPU and memory resources allocated to the metrics exporter sidecar container.

| Field | Description |
|---|---|
| CPU | CPU request for the exporter sidecar (e.g., 100m). |
| Memory | Memory request for the exporter sidecar (e.g., 256Mi). |
2.4 - OpsRequest Options and Apply
Expand OpsRequest Options to configure the timeout and apply policy for the vertical scaling operation.
- Timeout: Maximum time allowed for the operation (e.g.,
30sec,1min,2h). - Apply: Choose IfReady to apply only when the database is healthy, or Always to apply unconditionally.
- Preview: Click Preview to review the generated OpsRequest manifest.
- Submit: Once satisfied, click Submit to apply the vertical scaling changes.
Tip: On the Preview page, you can switch to YAML or JSON view to edit the manifest directly before submitting.
3. Compute Autoscaling
Use this method to automatically adjust CPU and memory based on actual workload demands. The autoscaler monitors resource usage and applies changes according to the policies you configure.
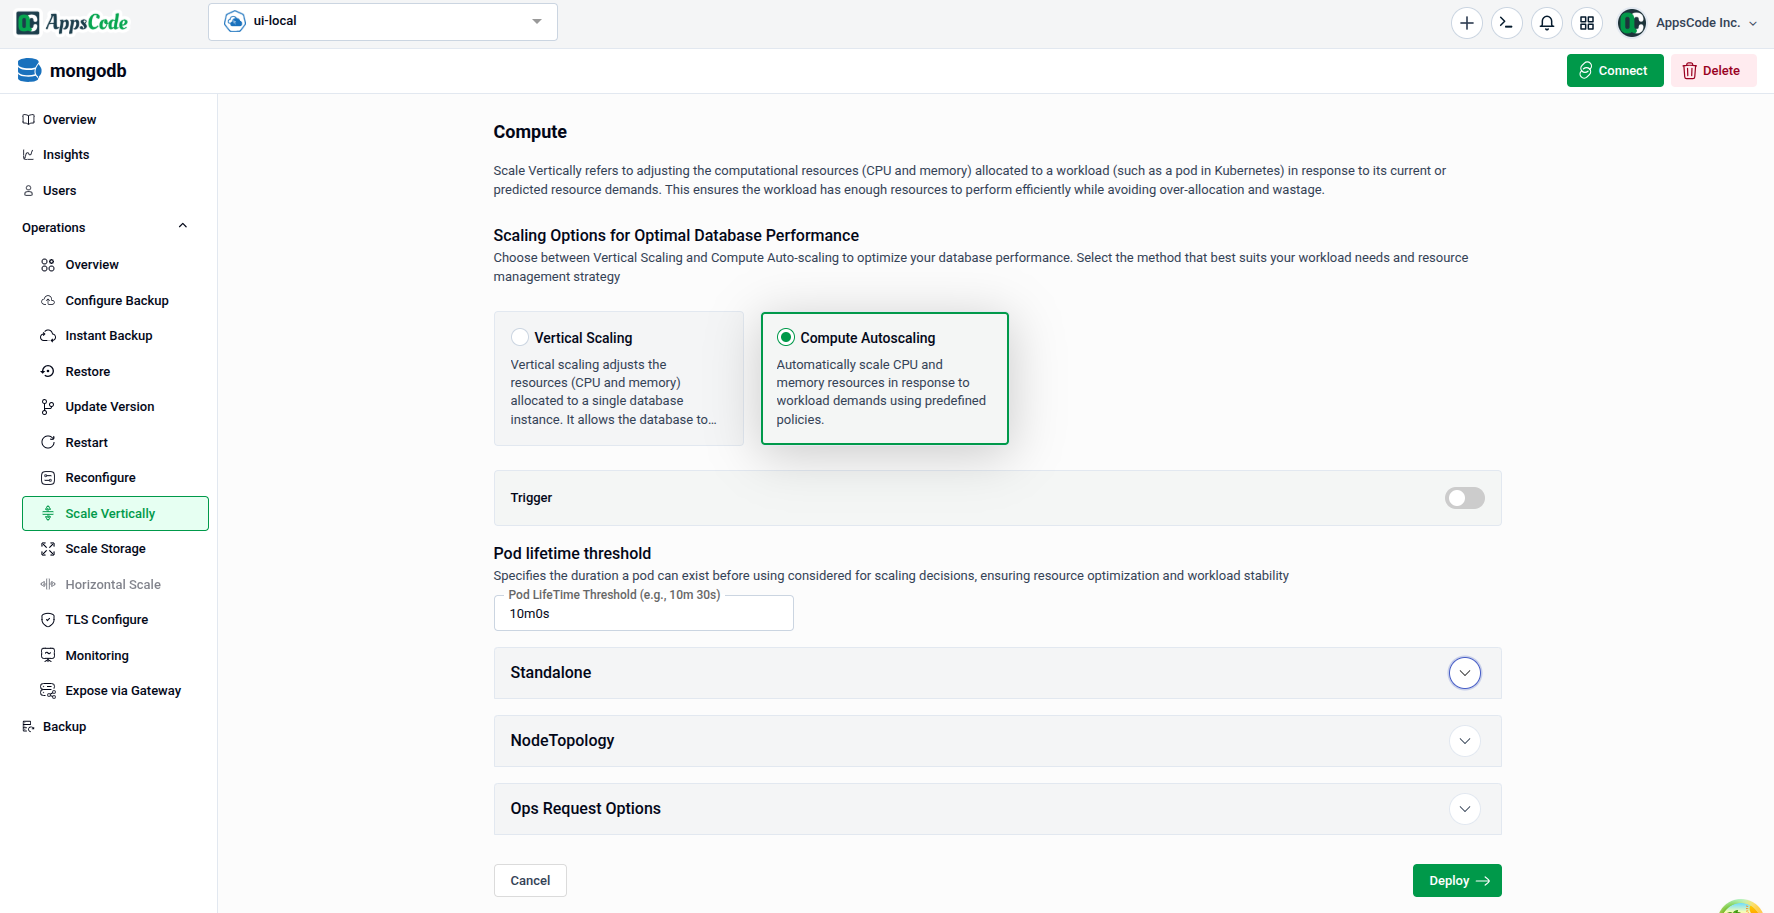
3.1 - Trigger and Pod Lifetime Threshold
- Trigger: Toggle to enable or disable the autoscaling policy. When enabled, the autoscaler actively monitors and adjusts resources.
- Pod Lifetime Threshold: Specifies the minimum duration a pod must have been running before it is considered for autoscaling decisions. This prevents scaling actions on freshly started pods that have not yet stabilised.
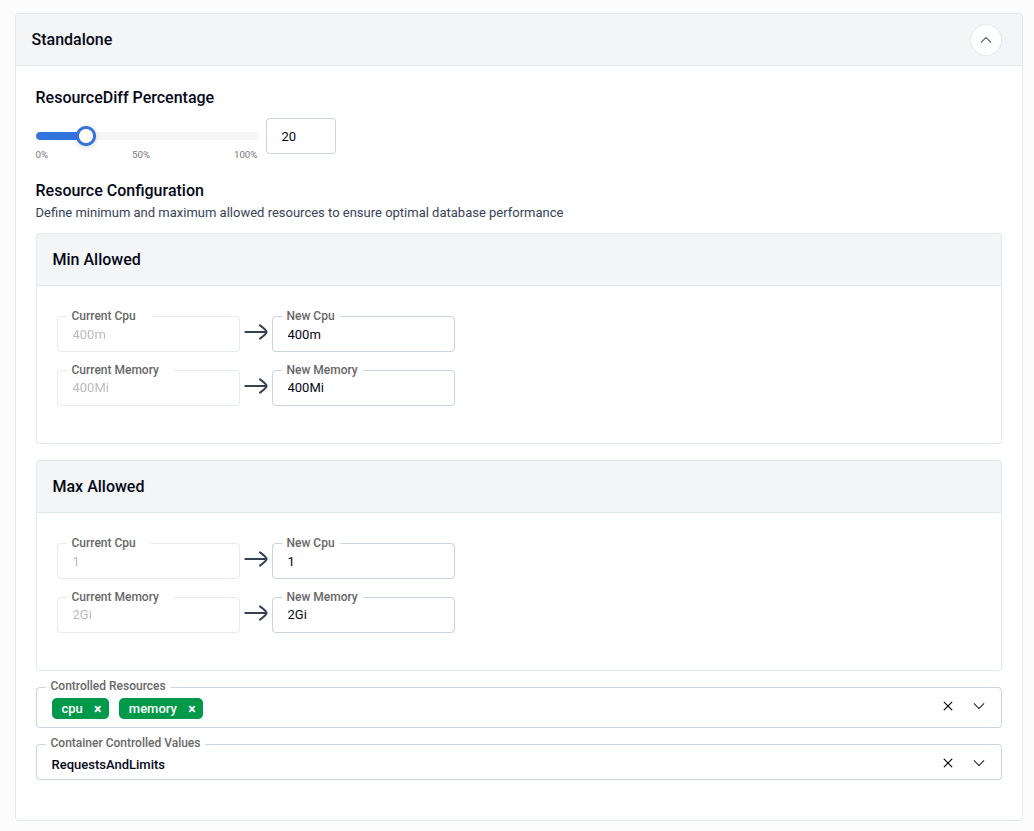
3.2 - Standalone Resource Configuration
The Standalone panel defines the resource boundaries and scaling sensitivity for standalone database nodes.
| Field | Description |
|---|---|
| ResourceDiff Percentage | The minimum percentage difference between the current and recommended resource values required to trigger a scaling action. Adjust using the slider (0-100%). |
| Min Allowed - CPU | The minimum CPU the autoscaler is allowed to set (e.g., 400m). |
| Min Allowed - Memory | The minimum memory the autoscaler is allowed to set (e.g., 400Mi). |
| Max Allowed - CPU | The maximum CPU the autoscaler is allowed to set (e.g., 1). |
| Max Allowed - Memory | The maximum memory the autoscaler is allowed to set (e.g., 2Gi). |
| Controlled Resources | The resource types the autoscaler manages — typically cpu and memory. |
| Container Controlled Values | Determines whether the autoscaler adjusts RequestsAndLimits, RequestsOnly, or LimitsOnly. |
3.3 - NodeTopology
The NodeTopology panel lets you constrain autoscaling decisions to a specific node topology group, ensuring recommendations stay within the resource limits of a particular node class.

- Select NodeTopology: Choose a node topology from the dropdown to scope the autoscaler's resource recommendations to the capacity of nodes in that topology.
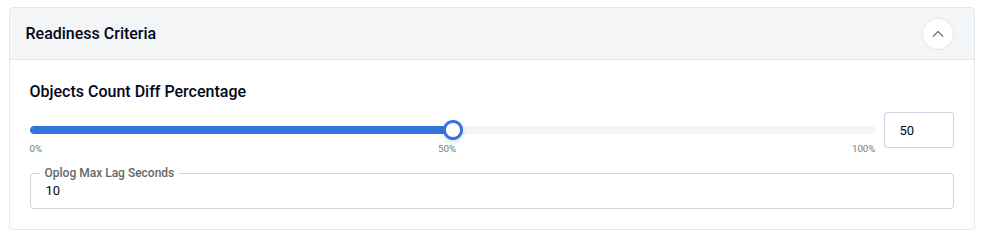
3.4 - Readiness Criteria
The Readiness Criteria panel defines conditions that must be met before the autoscaler applies a scaling recommendation.
| Field | Description |
|---|---|
| Objects Count Diff Percentage | Maximum acceptable difference (%) in object counts between primary and secondaries before scaling is allowed (0-100%, e.g., 50). |
| Oplog Max Lag Seconds | Maximum acceptable replication lag in seconds before scaling is allowed (e.g., 10). |
Note: These criteria ensure autoscaling only occurs when the database is in a consistent, healthy state — preventing resource changes during replication lag or data inconsistency.
3.5 - OpsRequest Options and Apply
Expand OpsRequest Options to configure how the autoscaling OpsRequest is applied.
- Timeout: Maximum time allowed for the autoscaling operation.
- Apply: Choose IfReady (recommended) or Always.
- Preview: Click Preview to review the generated autoscaling manifest.
- Submit: Once satisfied, click Submit to activate the autoscaling policy.
4. Horizontal Scaling
Use Horizontal Scale to increase or decrease the number of database replicas. More replicas improve fault tolerance and distribute read load; fewer replicas conserve cluster resources.
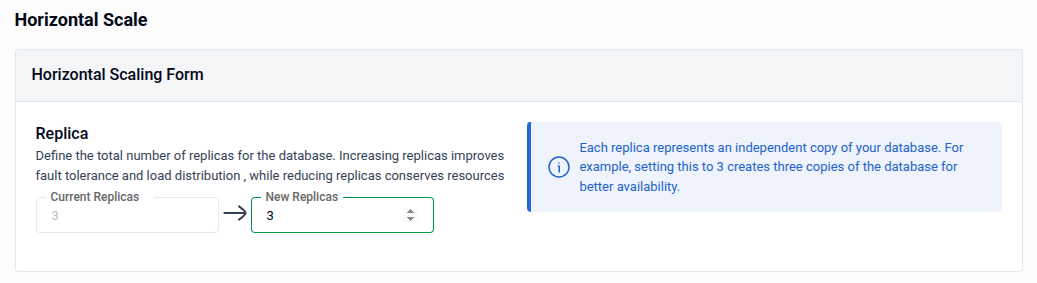
- Current Replicas: Displays the current replica count (read-only, shown for reference).
- New Replicas: Enter the desired replica count using the spinner or by typing directly. Each replica is an independent copy of your database — for example, setting this to
3creates three copies for improved availability. - Preview: Click Preview to review the generated OpsRequest manifest.
- Submit: Once satisfied, click Submit to apply the replica change.
Note: After every Preview, you must click Submit to save your changes.
Tip: On the Preview page, you can switch to YAML or JSON view to edit the manifest directly before submitting.
Quick Reference
| Action | How to do it |
|---|---|
| Manually set CPU and memory | Select Vertical Scaling → configure Machine Profile → Preview → Submit |
| Choose a node preset profile | Configure Your Machine Profile → select from Resources dropdown |
| Pin database to specific nodes | Node Selection → set Node Selection Policy and Topology |
| Set exporter sidecar resources | Exporter → enter CPU and Memory values |
| Enable compute autoscaling | Select Compute Autoscaling → enable Trigger → configure Standalone bounds → Preview → Submit |
| Scope autoscaling to a node class | NodeTopology → select a topology from the dropdown |
| Set autoscaling readiness gates | Readiness Criteria → set Objects Count Diff % and Oplog Max Lag Seconds |
| Change the number of replicas | Select Horizontal Scaling → set New Replicas → Preview → Submit |
| Edit manifest before applying | Use the YAML / JSON toggle on the Preview page |