


Cluster Overview
The Cluster Overview page is your primary dashboard for a connected Kubernetes cluster. It shows cluster identity, status, installed Feature Sets, and live node information — all in one place.
Step 1 — Open Your Cluster
From the AppsCode Console UI home screen, you will see the ALL CLUSTERS grid. Each cluster card shows its name, status badge (e.g., Active), Kubernetes version, provider, number of nodes, and age.
Click on any cluster card to open its Overview page.
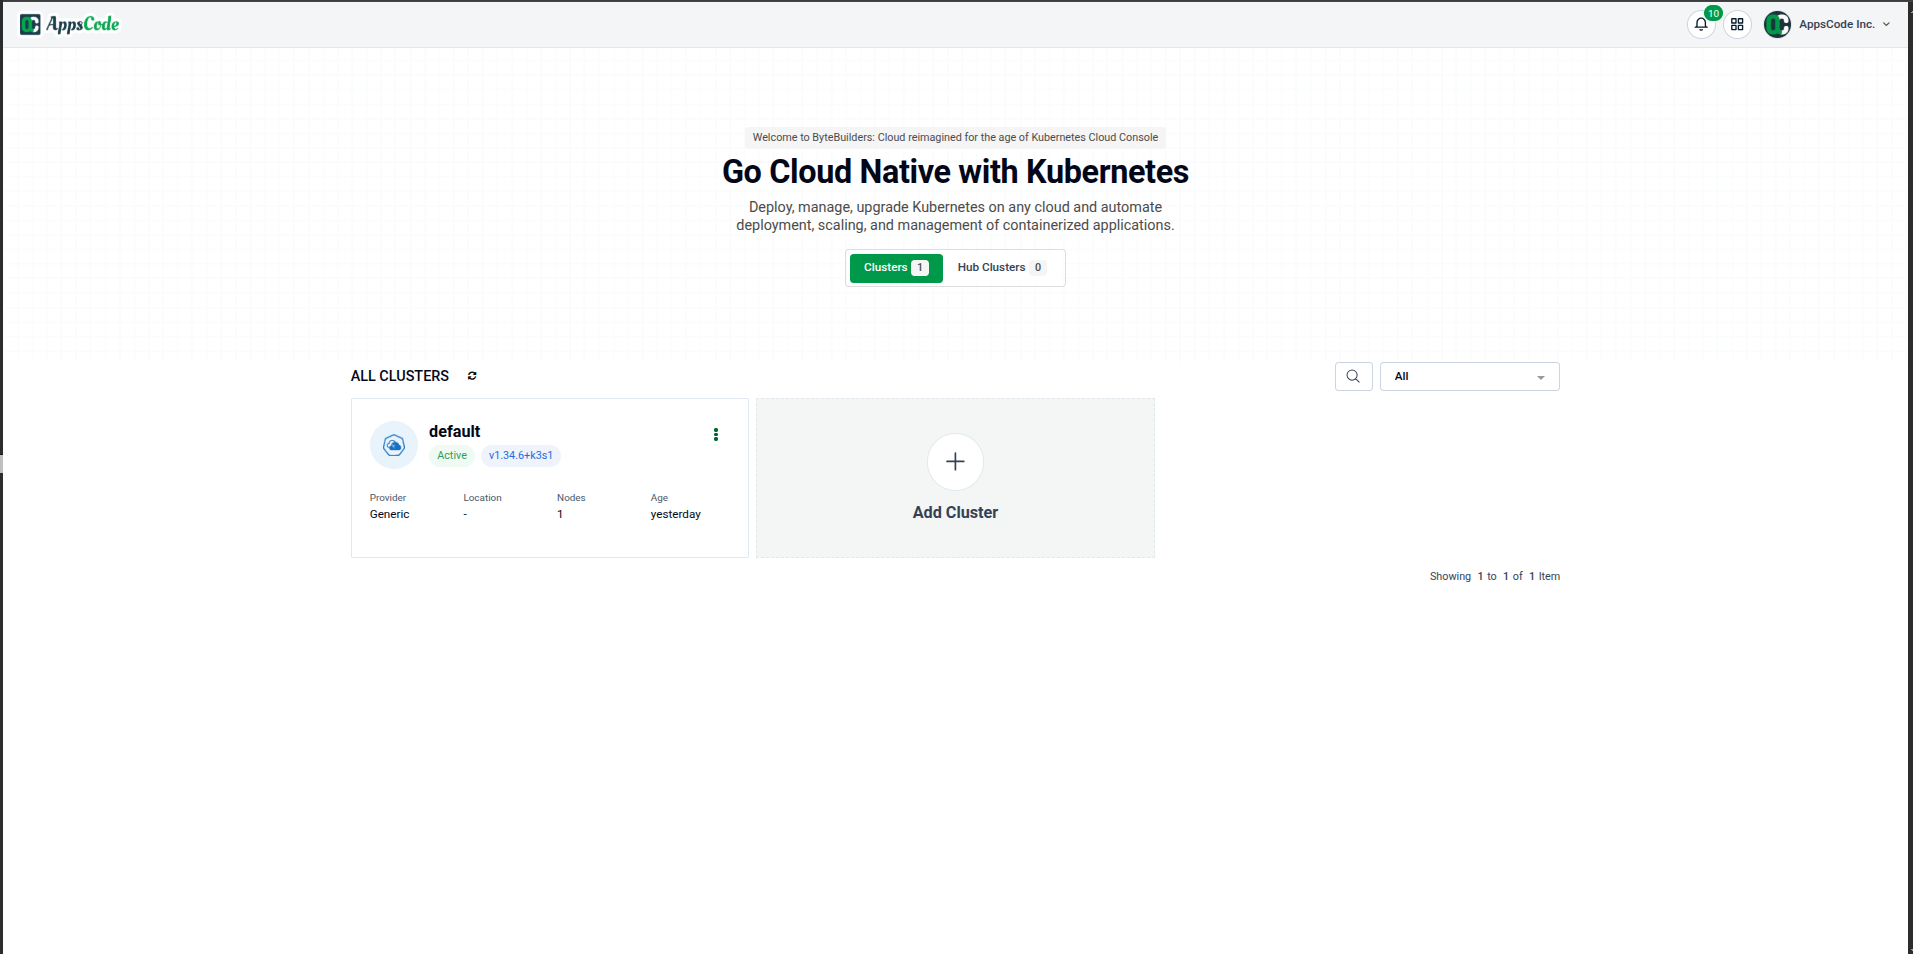
The + Add Cluster tile lets you import a new cluster at any time.
Step 2 — Read the Cluster Overview Page
After clicking your cluster, you land on the Cluster Overview page. The page is organized into three sections: Basic, Feature Sets, and Nodes.
Basic Information
The Basic section at the top displays the cluster's core identity:
| Field | Description |
|---|---|
| Name | The cluster name as registered in AppsCode |
| Endpoint | The Kubernetes API server address |
| UID | The unique identifier of this cluster |
| Provider | Cloud or infrastructure provider (e.g., Generic, AWS, GCP) |
| Zone | Deployment zone (if applicable) |
| Status | Connection state — Active means the cluster is reachable |
| Kubernetes Version | The version of Kubernetes running on this cluster |
Two action buttons appear top-right inside this section:
- Connect — Downloads a KubeConfig for direct
kubectlaccess - Remove — Disconnects and removes the cluster from AppsCode

Step 3 — Download the KubeConfig
Click the Connect button to open the Kube Config modal. This dialog shows the full kubeconfig YAML for your cluster with two action buttons:
- ⬇ Download — Saves the kubeconfig file to your local machine
- Copy — Copies the content to your clipboard
You can use this kubeconfig with kubectl to interact directly with the cluster from your terminal.

Step 4 — Review Feature Sets
Scroll down past the Basic section to see the Feature Sets grid. Each card represents a product module from AppsCode that can be installed on your cluster.
Available Feature Sets
| Feature Set | Description |
|---|---|
| Opscenter Core (Required) | Core management capabilities — must be installed first |
| Backup & Recovery | Scheduled backup & recovery using KubeStash |
| Cluster API AWS (CAPA) | Lifecycle tools for AWS-provisioned clusters |
| Cluster API GCP (CAPG) | Lifecycle tools for GCP-provisioned clusters |
| Cluster Management | Cluster provisioning & management tools |
| Cost Management | Measure and allocate infrastructure and container costs |
| Crossplane | The cloud-native control plane framework |
| Databases | Production-grade database management via KubeDB |
| Kubernetes Native Service | Components for Kubernetes Native Service patterns |
| Multicluster Hub | Deploy and manage a multicluster hub |
| Multicluster Spoke | Connect this cluster as a spoke to a hub |
| Networking Addons | Various networking addons for Kubernetes |
| Observability | Cluster monitoring with Prometheus and Grafana |
| Opscenter Tools | DevOps tools for ACE |
| Policy Management | Platform policy management tools |
| Secret Management | Tools for secret management |
| Security | TLS, secret scanning, and vulnerability tools |
| Storage Addons | Various storage addons for Kubernetes |
Status Badges
Each Feature Set card shows a status badge:
- Ready (green) — Installed and fully operational
- Not Ready (yellow) — Installed but not fully operational
- Not Installed (red) — Available but not yet enabled on this cluster
Hover over any Not Installed card to see a tooltip like "No feature enabled yet for this feature set."

Click any Feature Set card to open the Feature Set Management page where you can enable or configure its components. See Feature Management for a full walkthrough.
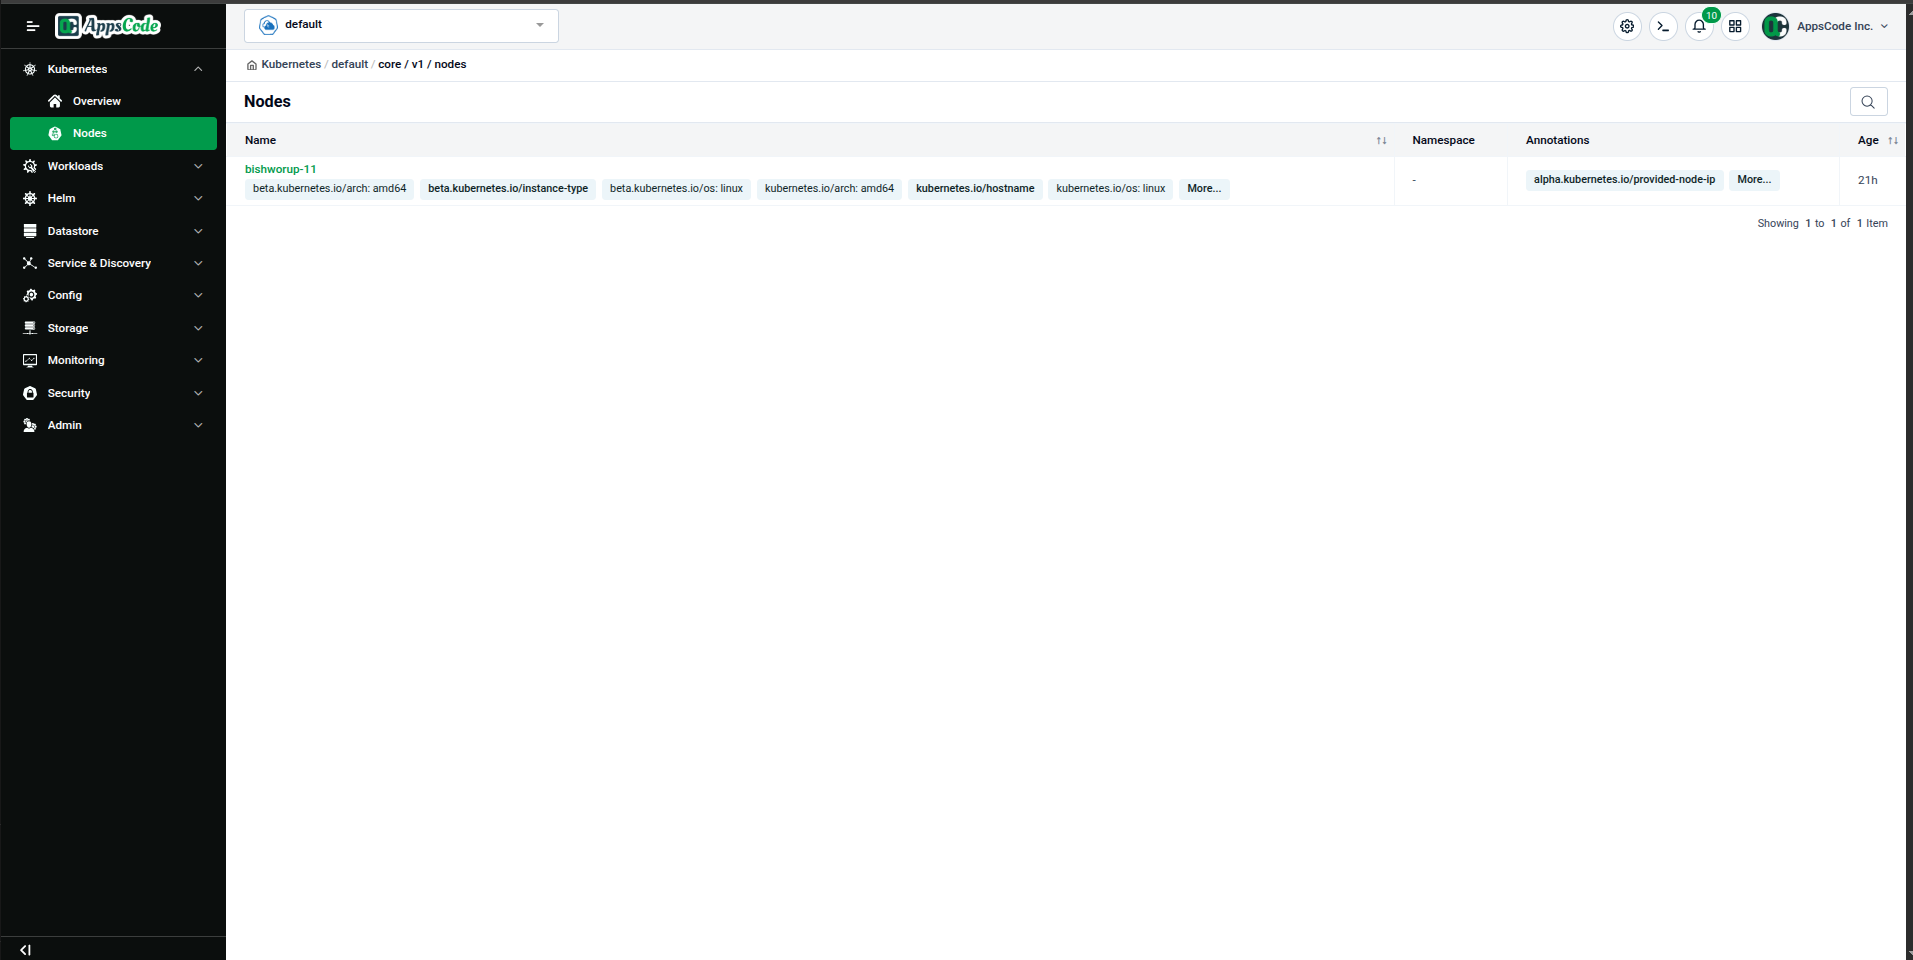
Step 5 — View Nodes
Scroll past the Feature Sets grid to the Nodes section. Each registered cluster node is shown as a card with:
- Node Name and Status (e.g.,
Ready) - Kubernetes version, architecture, and OS labels
- Role (e.g.,
control-plane) - CPU cores, Memory (GiB), and active Pods count
- Pod CIDR and Internal IP
- Age
Click Nodes in the left sidebar to open the dedicated Nodes list page, which shows all nodes with their labels and annotations in a table format.
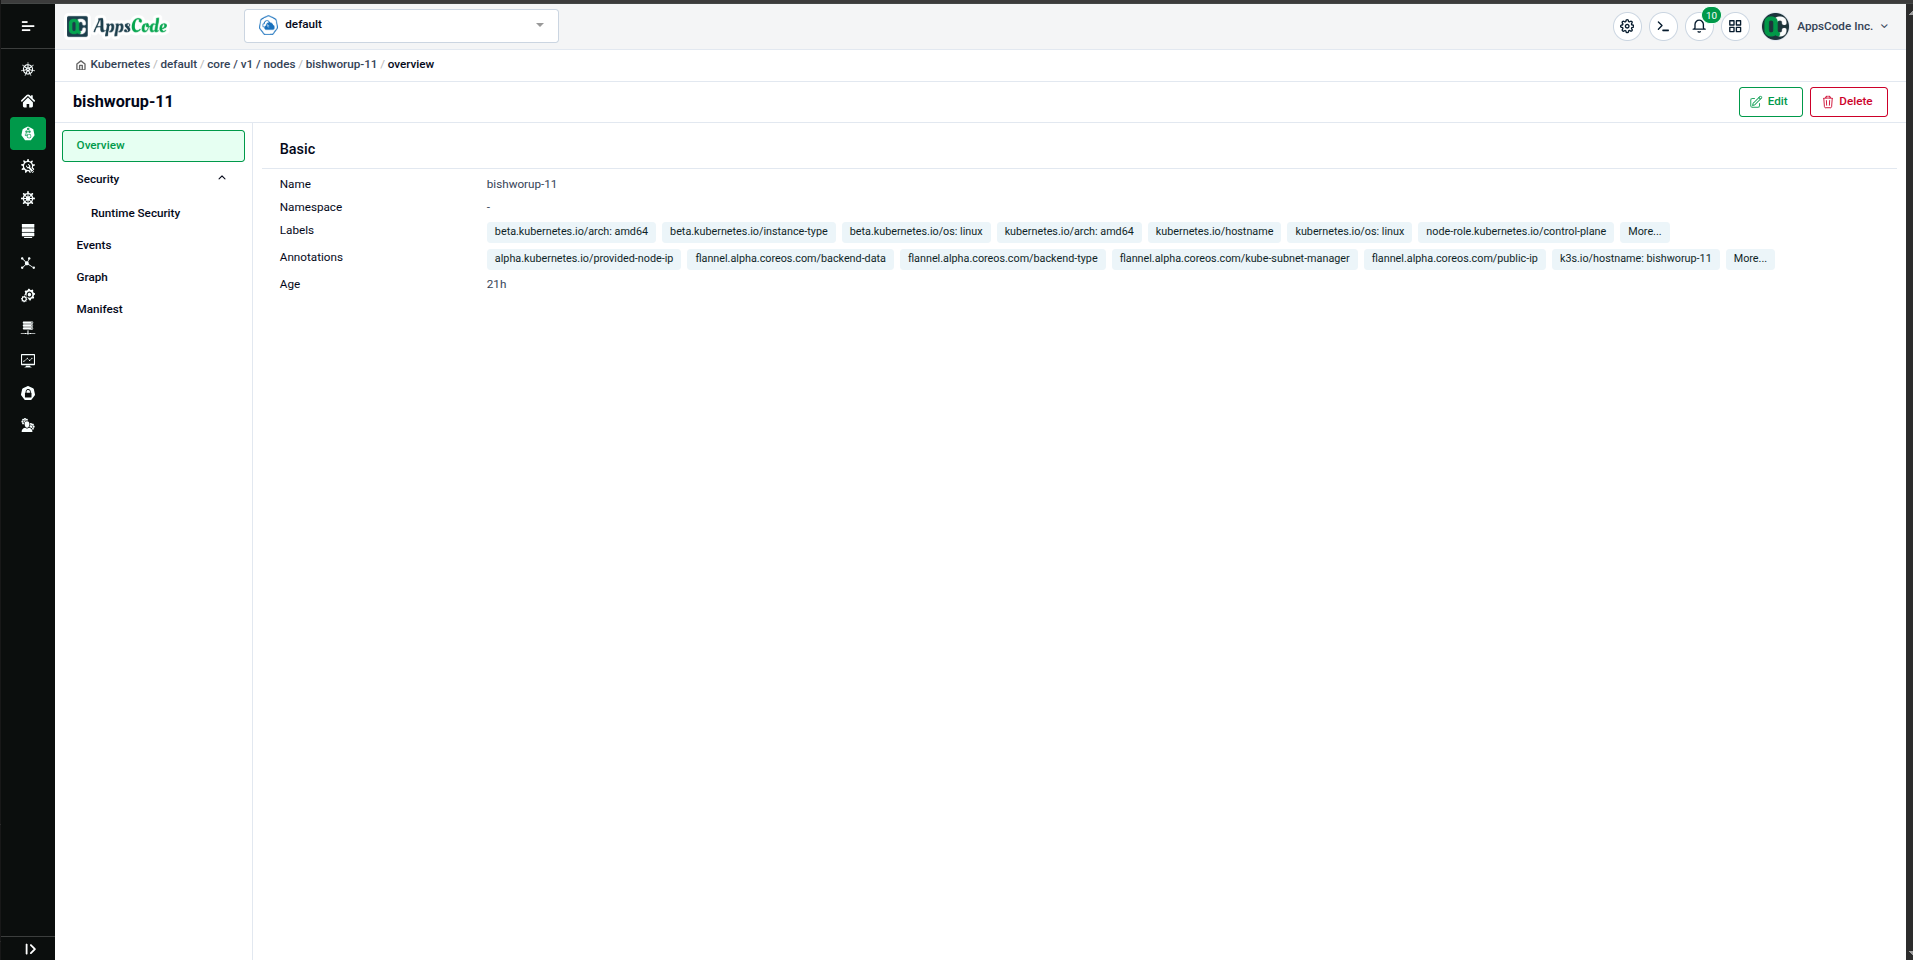
Step 6 — View Node Details
Click on a node's name in the Nodes list to open the Node Detail page. This page shows:
- Name, Namespace, Labels, and Annotations in the Basic tab
- Sub-pages accessible from the left panel: Security, Events, Graph, Manifest
Use the Edit button (top-right) to modify the node spec, or Delete to remove the node from the cluster.
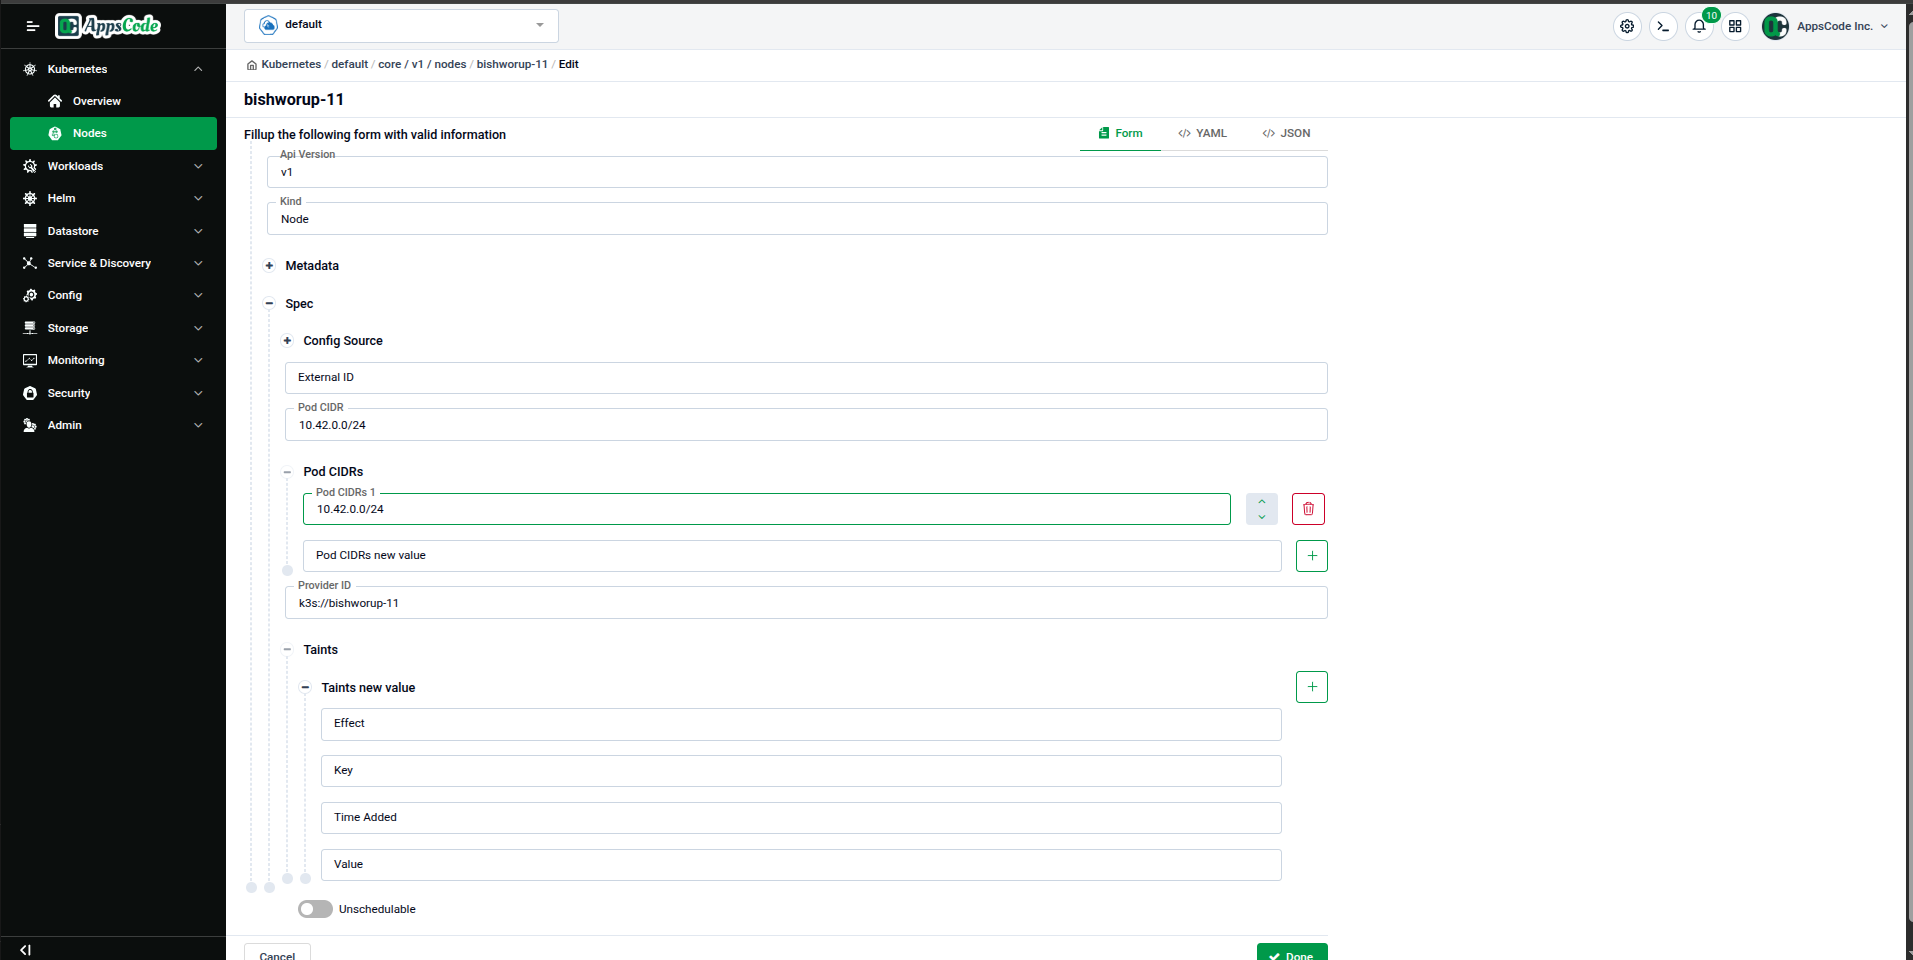
Editing a Node
Clicking Edit opens a structured form where you can modify:
- Pod CIDRs — Network ranges assigned to the node
- Taints — Taint key/value pairs and effects for scheduling control
- Unschedulable toggle — Mark the node as unschedulable
Switch between Form, YAML, and JSON views using the tabs at the top-right of the editor.
Quick Reference
| Task | How to do it |
|---|---|
| Open a cluster | Click the cluster card on the home screen |
| Download kubeconfig | Click Connect in the Basic section → Download |
| Check Feature Set status | Scroll to the Feature Sets grid — green = Ready, red = Not Installed |
| Manage a Feature Set | Click the Feature Set card → Feature Management page |
| View all nodes | Click Nodes in the left sidebar |
| Edit a node | Open node detail → Edit button |